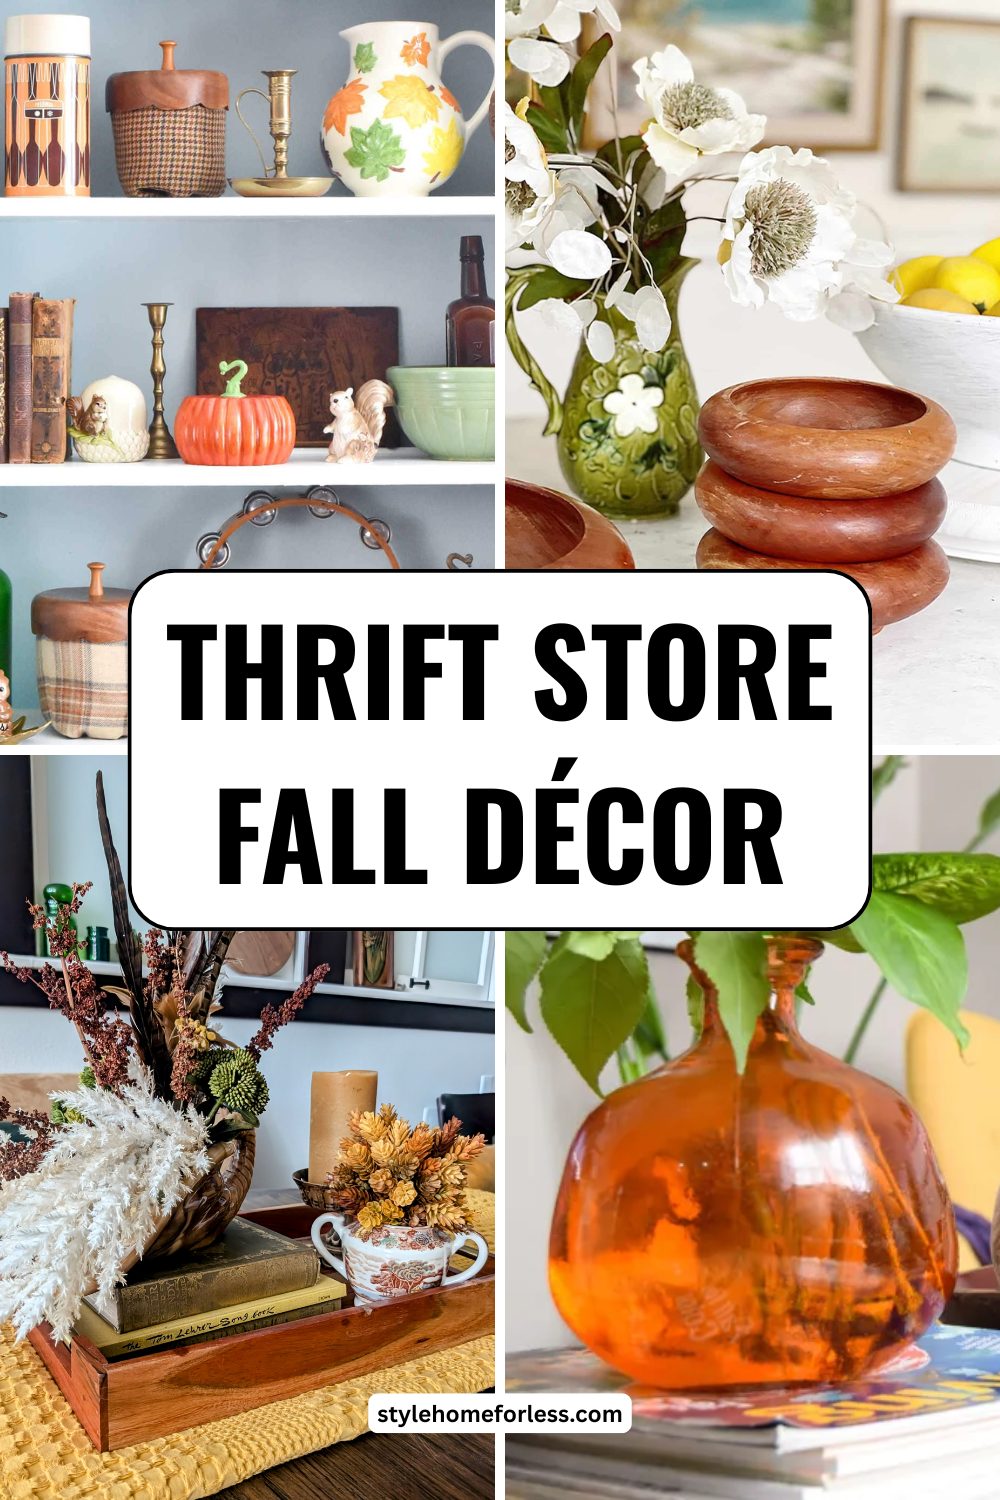
When secondhand becomes spectacular: Real transformations from actual thrift finds
Tuesday morning, 9:43 AM. I’m standing in the housewares section of Goodwill, holding a tarnished brass candlestick that looks like it survived both world wars and possibly the Civil War.
“This thing is hideous,” I muttered, turning it over to check the price. $2.50.
The woman next to me, rifling through a box of mismatched plates, looked over and nodded sympathetically. “Thrift store decorating is just… depressing, isn’t it? Everything’s either broken or ugly.”
I almost agreed with her. Almost.
But then I remembered the brass hurricane lamp sitting on my dining room table—the one that gets compliments from every single person who visits my apartment. The one people assume came from Pottery Barn but actually cost me $3.50 at this exact same Goodwill six months ago.
Plot twist: That “hideous” candlestick? It’s now the centerpiece of my fall mantel, and three people have asked where I bought it.
The secret isn’t finding perfect pieces at thrift stores. It’s developing the superpower to see potential where others see junk.
The Thrift Store Reality Check Nobody Talks About

Let’s be brutally honest about thrift store decorating: 90% of what you’ll find is genuinely awful. Outdated, damaged, or just plain weird. The stuff people donated because they couldn’t even bring themselves to throw it away.
But here’s what changed my entire approach: those hidden gems that make up the other 10%? They’re better than anything you can buy new.
Why thrift store finds are actually superior:
- Authentic character that new pieces fake
- Quality materials from eras when things were built to last
- Unique details you won’t find in mass-produced items
- Patina and wear that look intentionally expensive
- One-of-a-kind pieces that make your space memorable
The learning curve is real, though. I’ve made spectacular mistakes. Like the ceramic rooster collection phase of 2023 that we don’t discuss. Or the macramé owl that haunted my living room for three months.
But once you develop the eye for potential? Game over. You’ll walk past $60 Target candle holders to rescue a $4 brass treasure that just needs some polish and love.
My $47 Thrift Store Fall Haul: 8 Transformations
Last weekend, I challenged myself to create a complete fall decorating scheme using only thrift store finds. Budget: $50 maximum. Time limit: One Saturday morning.
The mission: Prove that thrift store fall decorating can look as sophisticated as expensive retail alternatives.
The reality: I spent $47 and found enough pieces to decorate my entire apartment, plus have extras for winter decorating.
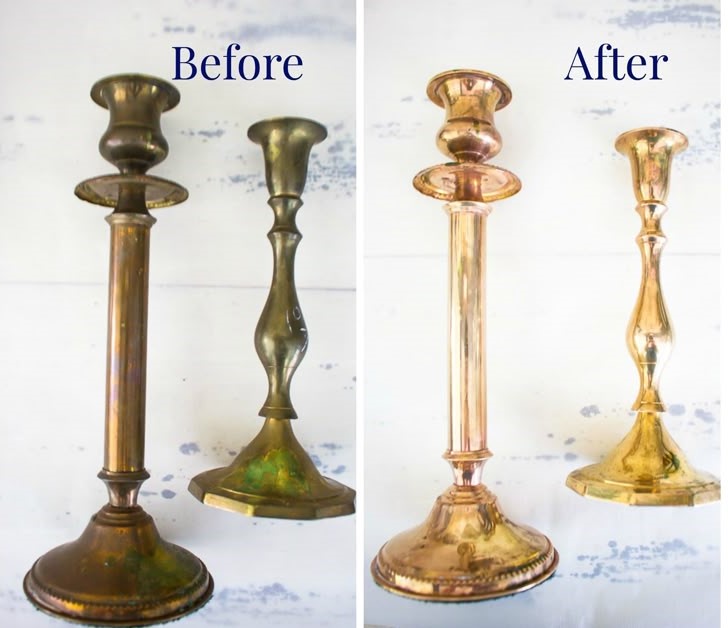
TRANSFORMATION #1: The Brass Candlestick Rescue
BEFORE: Tarnished and Forgotten
Found at: Salvation Army
Price paid: $2.50
Condition: Heavy tarnish, waxy buildup, looked like it hadn’t been cleaned since 1987
What I saw: Perfect weight (quality brass), beautiful proportions, classic design that would work with multiple décor styles
THE TRANSFORMATION PROCESS:
Step 1: Assessment and Cleaning Time: 20 minutes
Removed years of candle wax using a hair dryer on low heat (melts wax safely) and plastic scraper. Paper towels caught the melted mess.
Step 2: Tarnish Removal Time: 15 minutes
Used homemade paste: equal parts baking soda and lemon juice. Applied with soft cloth, worked in small circles, rinsed thoroughly.
Pro tip: Test cleaning solution on bottom first. Some “brass” is actually brass-plated and harsh cleaners can remove the plating.
Step 3: Protective Finishing Time: 5 minutes
Light coat of clear wax to prevent future tarnishing and fingerprints.
AFTER: Statement Piece Perfection
Current value: Similar new pieces retail for $35-55
Time invested: 40 minutes
Total transformation cost: $2.50 + cleaning supplies I already had
How I styled it: Paired with a cream pillar candle, positioned on my fall mantel next to mini white pumpkins. The warm brass plays beautifully against the cool whites and greens.
Guest reactions: “That candlestick is gorgeous! West Elm?” Nope. Salvation Army salvation story.
TRANSFORMATION #2: The Vintage Platter Revolution
BEFORE: Outdated and Overlooked
Found at: Church rummage sale
Price paid: $3.00
Condition: 1970s gold-rimmed serving platter, slightly scratched but structurally perfect
What others saw: Dated formal dining piece from their grandmother’s era
What I saw: Perfect fall serving piece and styling element
THE TRANSFORMATION APPROACH:
Option A: Embrace the Vintage Time: 0 minutes (no modification needed)
Sometimes the best transformation is simply changing context. This platter’s gold rim and warm tone work perfectly for autumn styling without any alteration.
Current styling: Layer different sized pumpkins, gourds, and pinecones for a harvest abundance display. The gold rim elevates the natural elements.
Option B: Modern Update (for those who want to modify) Time: 30 minutes
Light sandpaper around the rim, then spray paint with matte gold for a more contemporary finish. The vintage shape with updated finish bridges old and new.
AFTER: Sophisticated Seasonal Display
Current value: Similar handmade ceramic platters retail for $45-75
Styling versatility: Works as wall art, coffee table centerpiece, or actual serving piece for fall entertaining
The mindset shift: I stopped seeing this as “old” and started seeing it as “authentic vintage character.”
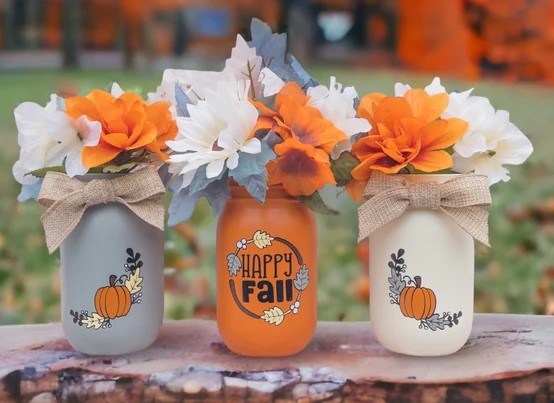
TRANSFORMATION #3: The Mason Jar Evolution
BEFORE: Basic and Boring
Found at: Yard sale (box of 6)
Price paid: $4.00 for all six
Condition: Standard Ball mason jars, various sizes, some rust on lids
What I saw: Versatile containers perfect for multiple fall decorating needs
THE TRANSFORMATION METHODS:
Method 1: Autumn Luminaries Materials needed: Battery tea lights, fall leaves Time: 10 minutes per jar
Placed preserved fall leaves inside jars, added battery-operated tea lights. The leaves create beautiful shadow patterns on walls.
Method 2: Harvest Storage Materials needed: Burlap ribbon, small seasonal objects Time: 5 minutes per jar
Filled with acorns, pinecones, and cinnamon sticks. Tied burlap bows around the rims. Perfect for mantel styling or shelf displays.
Method 3: Rustic Vases Materials needed: Twine, small branches or wheat Time: 8 minutes per jar
Wrapped jars with natural twine, filled with dried wheat or interesting branches. Creates instant farmhouse fall charm.
AFTER: Versatile Seasonal Collection
Current value: Decorative mason jar sets retail for $8-15 each
My cost: $0.67 per jar
Bonus: Different sizes allow for varied styling throughout the space
Reality check: I use these constantly. They’re not just decoration—they’re functional storage that happens to look great.
TRANSFORMATION #4: The Wicker Basket Rescue

BEFORE: Damaged and Discarded
Found at: Estate sale
Price paid: $1.50
Condition: Large wicker basket with broken handle, slightly unraveling in spots
What others saw: Damaged goods destined for the trash
What I saw: Authentic texture and perfect fall display container
THE RESTORATION PROCESS:
Step 1: Structural Assessment Time: 5 minutes
Determined which damage affected function vs. appearance. Loose weaving could be tightened; broken handle could be removed entirely.
Step 2: Strategic Repair Time: 25 minutes
Used small dab of clear craft glue to secure loose weaving. Removed broken handle completely—discovered the basket looked better without it.
Step 3: Styling for Strengths Time: 10 minutes
Positioned damaged areas toward the back, highlighted the beautiful weave patterns and natural color variations.
AFTER: Rustic Charm Champion
Current value: Similar new baskets retail for $25-40
Styling approach: Filled with throw blankets in fall colors, creating cozy storage that doubles as decoration
The lesson: Sometimes “damage” is just character in disguise. The imperfections make this basket feel authentically vintage.
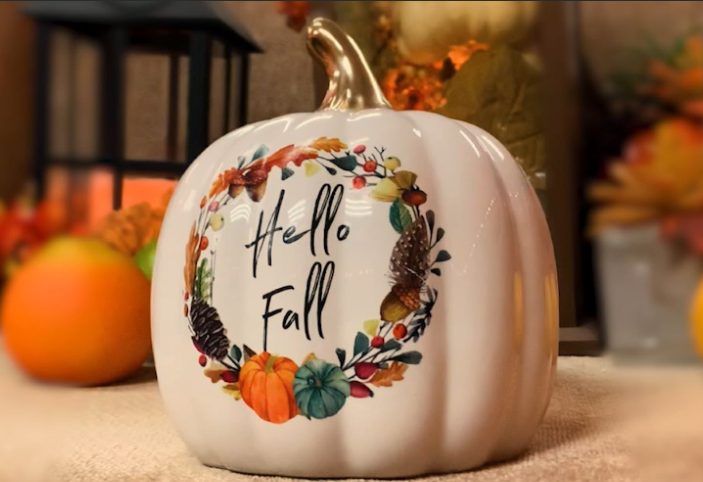
TRANSFORMATION #5: The Ceramic Miracle
BEFORE: Bland and Institutional
Found at: Thrift store clearance rack
Price paid: $0.50 (half-price day)
Condition: White ceramic vase, perfectly functional but completely generic
The challenge: How do you make boring beautiful?
THE CREATIVE TRANSFORMATION:
Option 1: Texture Addition Materials: Twine, hot glue Time: 30 minutes
Wrapped entire vase in natural twine, securing with small dots of hot glue every few inches. Creates instant rustic texture and warmth.
Option 2: Natural Patina Materials: Watered-down acrylic paint in warm brown Time: 45 minutes
Applied diluted paint with sponge in random patterns, wiped some areas clean while wet. Creates authentic-looking aged patina.
My choice: Went with the twine wrap for guaranteed success and reversibility.
AFTER: Textural Fall Accent
Current value: Similar textured vases retail for $18-30
Styling success: Filled with dried wheat and pampas grass, now the hero piece on my dining table
Confidence builder: This transformation proved that simple techniques create dramatic results.
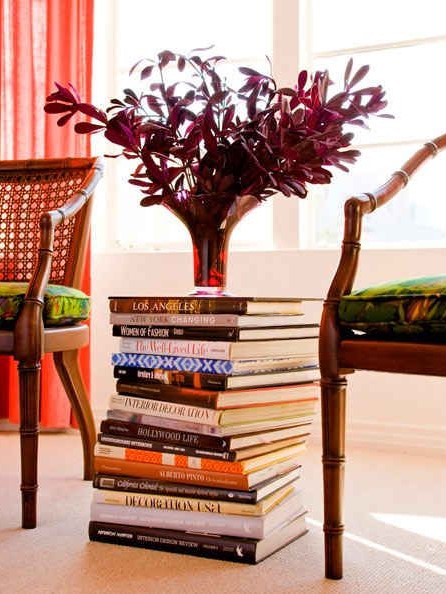
TRANSFORMATION #6: The Book Stack Strategy
BEFORE: Random Reading Reject
Found at: Library book sale
Price paid: $6.00 for 12 books
Condition: Hardcover books in decent shape but outdated topics
What I ignored: The actual content
What I focused on: Spine colors, sizes, and textures
THE CURATION PROCESS:
Step 1: Color Sorting Time: 15 minutes
Separated books by spine colors, focusing on fall tones: rust, gold, brown, cream, deep green.
Step 2: Size Categorization Time: 10 minutes
Grouped by height and thickness for maximum stacking potential.
Step 3: Strategic Selection Time: 20 minutes
Chose books that work together aesthetically while providing various heights for styling elevation.
THE STYLING APPLICATIONS:
Platform Creation: Stacked horizontally to create risers for other decorative objects
Vertical Displays: Grouped vertically with bookends for instant sophisticated shelving
Color Coordination: Used spines as design elements that tie room colors together
AFTER: Sophisticated Styling Tools
Current value: Decorative books retail for $8-15 each
My cost: $0.50 per book
Bonus: Can actually read them if I get bored with decorating
The revelation: Books are secret weapons for creating expensive-looking arrangements.
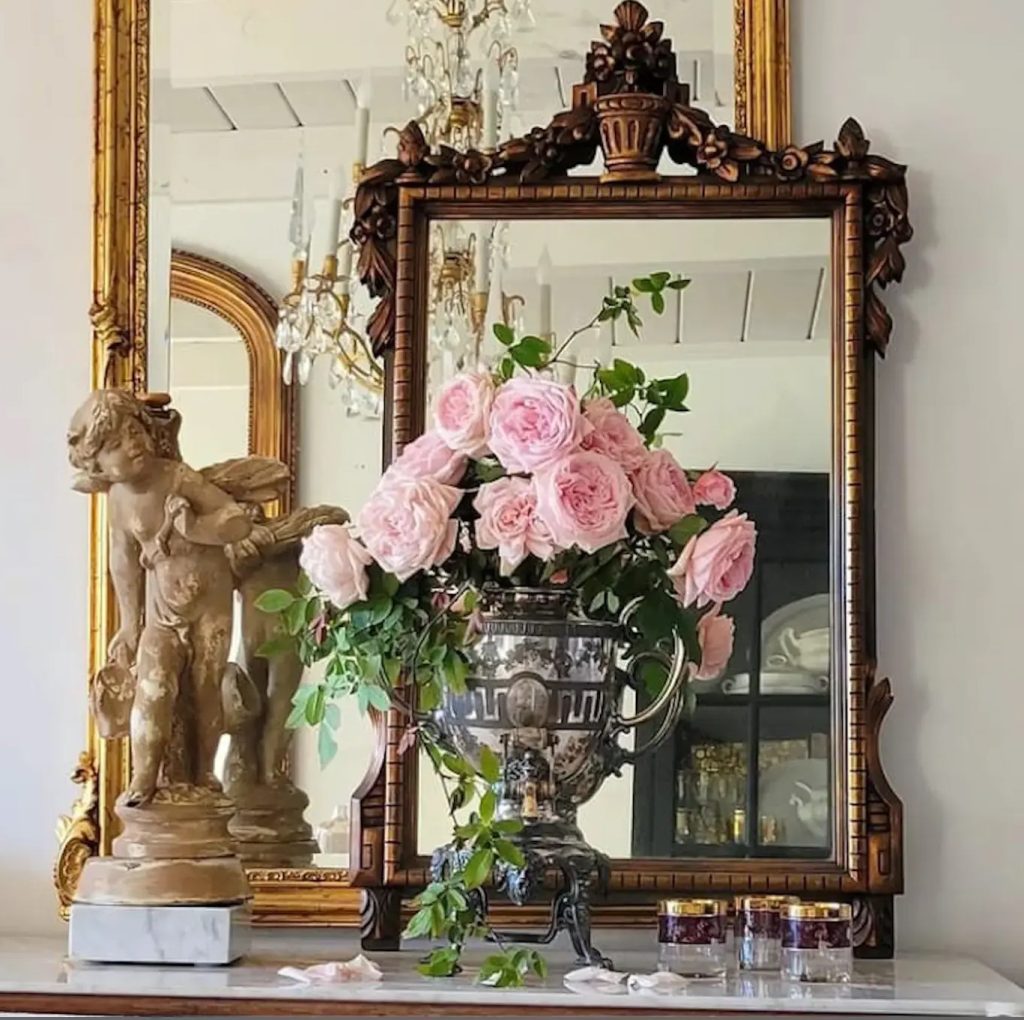
TRANSFORMATION #7: The Mirror Magic
BEFORE: Outdated and Overlooked
Found at: Flea market
Price paid: $8.00
Condition: 1980s mirror with brass frame, slightly tarnished but structurally perfect
What others saw: Dated bathroom fixture
What I saw: Instant wall art and light reflection
THE TRANSFORMATION STRATEGY:
Option 1: Frame Enhancement Materials: Metallic wax, soft cloth Time: 25 minutes
Applied gold metallic wax to brass frame, buffing to create subtle shimmer. Brought out original beauty without making it look new.
Option 2: Context Change No modification needed
Sometimes transformation is just smart placement. Moved from bathroom context to living room styling.
My approach: Combined both—enhanced the frame and repositioned for maximum impact.
AFTER: Sophisticated Wall Feature
Current value: Similar mirrors retail for $35-65
Styling impact: Reflects candlelight and window light, making entire room feel brighter and more spacious
Placement strategy: Positioned to reflect my fall mantel, effectively doubling the visual impact of seasonal decorating.
TRANSFORMATION #8: The Textile Triumph
BEFORE: Forgotten Fabric Finds
Found at: Church rummage sale
Price paid: $5.00 for bag of mixed linens
Condition: Vintage linen napkins and tablecloth, some staining but good structure
What I saw: Raw materials for custom fall textiles
THE REPURPOSING PROCESS:
Project 1: Throw Pillow Covers Time: 2 hours (including learning to sew)
Cut tablecloth into pillow cover pieces, used existing napkins as contrasting details. Hand-stitched because I don’t own a sewing machine.
Project 2: Table Runners Time: 30 minutes
Hemmed napkins to create custom table runners in perfect fall colors.
Project 3: Wall Art Time: 45 minutes
Stretched interesting fabric pieces over canvases (made from cardboard and staples) for instant textile art.
AFTER: Custom Textile Collection
Current value: Custom throw pillows retail for $25-45 each
My investment: About $1.25 per finished piece
Skill building: Learned basic sewing while creating unique home décor
The pride factor: Every guest asks about these pieces because they’re clearly one-of-a-kind.
The Psychology of Successful Thrift Store Transformations
DEVELOPING “POTENTIAL VISION”
Look beyond current condition to underlying quality:
- Heavy, solid construction usually indicates quality materials
- Interesting shapes and proportions transcend temporary styling trends
- Natural materials (wood, brass, ceramic, glass) age better than synthetic
- Unique details that can’t be found in mass-produced items
Ask the right questions:
- “What would this look like clean and in the right setting?”
- “Could simple modifications make this work in my space?”
- “Is the underlying structure sound and well-made?”
- “Does this have character that new pieces lack?”
THE COLOR THEORY APPROACH
Hunt for specific color families:
- Warm fall tones: Rust, burgundy, gold, copper, warm browns
- Neutral bridges: Cream, natural linen, weathered wood, aged brass
- Deep accents: Forest green, navy, plum, charcoal
Pro strategy: Take photos of your existing décor before thrift shopping. Colors that work in your home are easier to identify when you have visual references.
UNDERSTANDING TRANSFORMATION EFFORT LEVELS

LOW EFFORT (5-30 minutes):
- Cleaning and polishing existing finishes
- Changing context or placement
- Simple styling with other objects
MEDIUM EFFORT (30 minutes – 2 hours):
- Basic modifications like painting or wrapping
- Minor repairs or part removal
- Repurposing for different function
HIGH EFFORT (2+ hours):
- Significant alterations or rebuilding
- Learning new skills for transformation
- Multi-step processes requiring tools
Budget accordingly: Low effort finds can be impulse purchases. High effort transformations need planned time and energy investment.
Store-by-Store Shopping Strategies
GOODWILL: The Volume Game
Best finds: Household items, books, small furniture, dishes
Shopping strategy: Visit frequently, inventory changes constantly
Timing: Monday-Wednesday for fresh donations, Saturday morning for full selection
Price range: $0.50-$15 for most decorating items
Goodwill secrets:
- Color-coded tags rotate through discounts weekly
- End caps often have unique items that don’t fit standard categories
- Books are priced to move—great for styling and actual reading
ESTATE SALES: The Quality Hunt
Best finds: High-quality vintage pieces, unique collectibles, authentic antiques
Shopping strategy: Arrive early for selection, late for discounts
Timing: Friday-Sunday, with best prices on final day
Price range: $1-$50+ depending on item quality and sale setup
Estate sale advantages:
- Items often well-maintained by original owners
- Complete room setups provide styling inspiration
- Sellers usually know item history and can share care instructions
CHURCH RUMMAGE SALES: The Community Connection
Best finds: Kitchen items, textiles, books, seasonal decorations
Shopping strategy: Friendly conversation often leads to better prices
Timing: Saturday mornings for selection, last hour for deals
Price range: $0.25-$10 for most items
Rummage sale benefits:
- Proceeds support community causes
- Volunteers often negotiate on prices
- Items typically donated by congregation members who cared for them
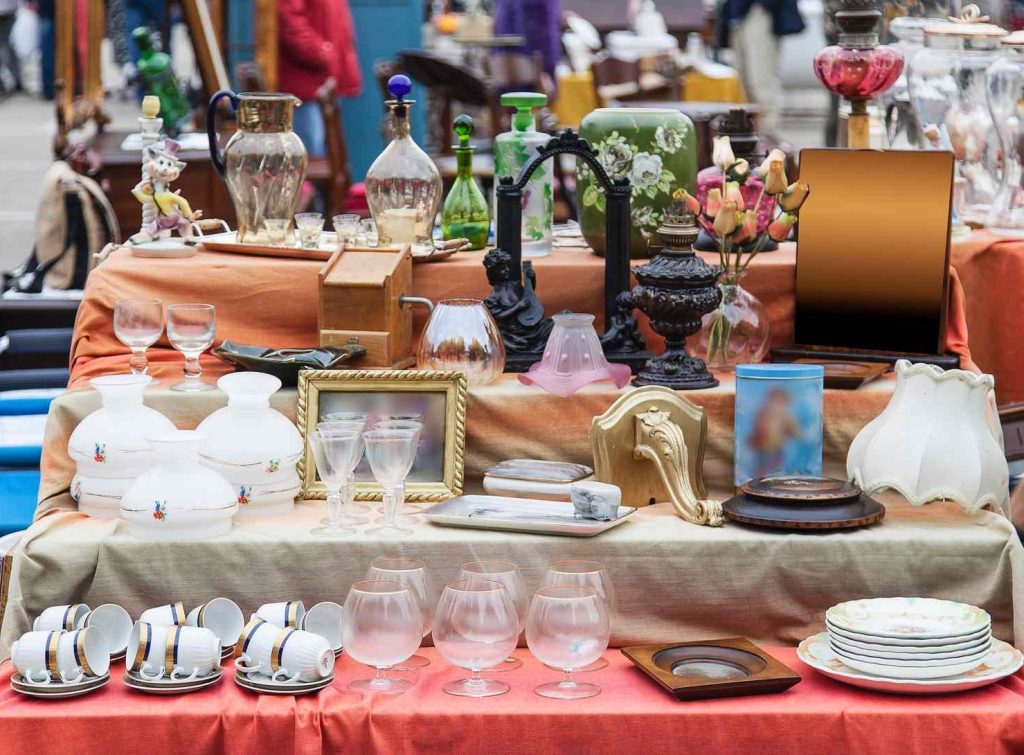
FLEA MARKETS: The Treasure Adventure
Best finds: Architectural salvage, vintage collectibles, regional specialties
Shopping strategy: Bring cash, negotiate respectfully, buy early or late
Timing: Early morning for best selection, closing time for discounts
Price range: $2-$100+ depending on vendor and item rarity
Flea market navigation:
- Vendors specialize, so find ones aligned with your style
- Prices often negotiable, especially for multiple purchases
- Weather affects attendance and vendor motivation to sell
Common Transformation Mistakes (And How to Avoid Them)
MISTAKE #1: Buying Based on Price Instead of Potential
What it looks like: Cart full of cheap items that don’t work together
Why it fails: Low price doesn’t guarantee successful transformation
The fix: Set style goals before shopping, stick to your color palette
MISTAKE #2: Overestimating Your DIY Skills
What it looks like: Complex project sits unfinished for months
Why it fails: Good intentions don’t equal actual capabilities
The fix: Start with simple transformations, build skills gradually
MISTAKE #3: Ignoring Scale and Proportion
What it looks like: Tiny objects that disappear or huge pieces that overwhelm
Why it fails: Size relationships affect how professional arrangements look
The fix: Measure your spaces, bring photos of rooms to reference while shopping
MISTAKE #4: Trying to Transform Everything
What it looks like: House full of obvious DIY projects rather than curated collection
Why it fails: Too many transformed pieces can look crafty instead of stylish
The fix: Mix thrift finds with regular purchases for balanced, natural-looking spaces
The Economics of Thrift Store Fall Decorating
MY COMPLETE FALL TRANSFORMATION COST ANALYSIS
Thrift store total: $47
Additional supplies (cleaning, minor modifications): $12
Time investment: Approximately 8 hours over two weekends
Final total: $59
COMPARABLE RETAIL COSTS:
- Brass candlesticks: $35-55 each
- Decorative serving platters: $45-75
- Mason jar sets: $40-60
- Wicker storage baskets: $25-40
- Ceramic vases: $18-30
- Decorative books: $8-15 each
- Vintage mirrors: $35-65
- Custom textiles: $25-45 each
Total retail equivalent: $275-385
My actual cost: $59
Savings: $216-326 (73-85% savings)
COST PER HOUR ANALYSIS
Time invested: 8 hours
Money saved: $216-326
Hourly “wage”: $27-41 per hour for enjoyable creative work
Value beyond money:
- Unique pieces no one else has
- Satisfaction of creative problem-solving
- Skills developed for future projects
- Environmental benefit of keeping items out of landfills
Seasonal Storage and Maintenance
PROTECTING YOUR THRIFT STORE INVESTMENTS
Proper cleaning before storage:
- Brass: Clean and wax to prevent tarnishing
- Textiles: Wash according to fabric type, ensure completely dry
- Ceramics: Clean thoroughly, wrap carefully to prevent chipping
- Books: Dust covers, store in climate-controlled area
Storage strategies:
- Photo inventory before packing away
- Group by season and style for easy access
- Use acid-free tissue paper for delicate items
- Label boxes with contents and room destinations
Maintenance schedule:
- Monthly: Quick dusting and condition check
- Seasonally: Deep cleaning and protective treatments
- Annually: Assessment for repair needs or replacement
Building Your Thrift Store Transformation Skills
BEGINNER LEVEL: Start Here
Focus: Cleaning, polishing, and smart styling
Best projects: Brass candlesticks, ceramic vases, books for styling
Success rate: 85-90% with basic effort
Skills to develop:
- Recognizing quality materials and construction
- Understanding what cleaning can accomplish
- Seeing potential beyond current condition
INTERMEDIATE LEVEL: Expanding Horizons
Focus: Simple modifications and repurposing
Best projects: Painting furniture, wrapping items with natural materials, basic textile work
Success rate: 70-80% with moderate effort
Skills to build:
- Basic tool use and safety
- Color theory and coordination
- Understanding of different material properties
ADVANCED LEVEL: Creative Confidence
Focus: Significant alterations and skilled modifications
Best projects: Furniture reconstruction, complex textile work, multi-step transformations
Success rate: 60-70% but with dramatic impact when successful
Advanced capabilities:
- Woodworking and furniture repair
- Sewing and textile modification
- Complex multi-material projects
Your Thrift Store Transformation Action Plan

WEEK 1: Skill Building and Research
Monday-Tuesday: Study your existing décor, identify style preferences and color palette
Wednesday-Thursday: Research local thrift stores, estate sales, and flea markets
Friday: Plan first shopping expedition with specific goals and budget
Weekend: First shopping trip focusing on one room or style theme
WEEK 2: Implementation and Learning
Monday-Tuesday: Begin transformations on purchased items
Wednesday-Thursday: Continue projects, document process with photos
Friday: Assess results, identify what worked and what needs improvement
Weekend: Style completed pieces in your space, adjust arrangements
WEEK 3: Expansion and Refinement
Monday-Tuesday: Second shopping trip based on lessons learned
Wednesday-Thursday: Work on new finds, building on previous experience
Friday: Evaluate overall progress and seasonal decorating goals
Weekend: Complete styling, photograph results, plan next steps
ONGOING: Monthly Thrift Store Routine
First weekend: Major shopping expedition with seasonal goals
Second weekend: Transformation work on new finds
Third weekend: Styling and arranging completed projects
Fourth weekend: Assessment and planning for next month
The Real Transformation: Confidence and Creativity
Six weeks after my $47 thrift store challenge, the biggest change wasn’t in my décor—it was in my mindset.
Before: I felt intimidated by expensive stores and overwhelmed by home decorating
After: I see potential everywhere and trust my own creative instincts
The confidence spillover effects:
- Stopped assuming expensive = better quality or design
- Started noticing details and craftsmanship in all kinds of objects
- Developed personal style instead of copying magazine layouts
- Gained appreciation for vintage and handmade items
The creative problem-solving skills transfer to everything:
- Budget management in other areas of life
- Resourcefulness in work and personal projects
- Confidence in tackling challenges that seem overwhelming initially
- Appreciation for the process, not just the outcome
Most importantly: I proved to myself that beautiful, personalized spaces don’t require unlimited budgets—they require creativity, patience, and willingness to see beyond the obvious.
Your thrift store transformation journey starts with one piece and one successful project. Build confidence with small wins, develop your eye through practice, and discover that the most beautiful homes often contain the most interesting stories.
The woman at Goodwill who thought thrift store decorating was depressing? She was looking at the wrong things. She was seeing what items were, instead of imagining what they could become.
That’s the difference between shoppers and creators. Between decorators and designers. Between following trends and developing personal style.
Your perfect fall décor is waiting in secondhand stores right now. It just needs someone with vision to rescue it.
Frequently Asked Questions
How do I clean thrift store items before using them as fall decor?
Most hard surfaces — glass, ceramic, brass, and wood — clean up nicely with a simple mix of white vinegar and warm water. For brass pieces, a paste of equal parts salt, flour, and white vinegar removes tarnish and restores shine. Fabric items like baskets should be checked for structural integrity first, then wiped down or lightly vacuumed. Let everything dry completely before styling, especially anything near candles.
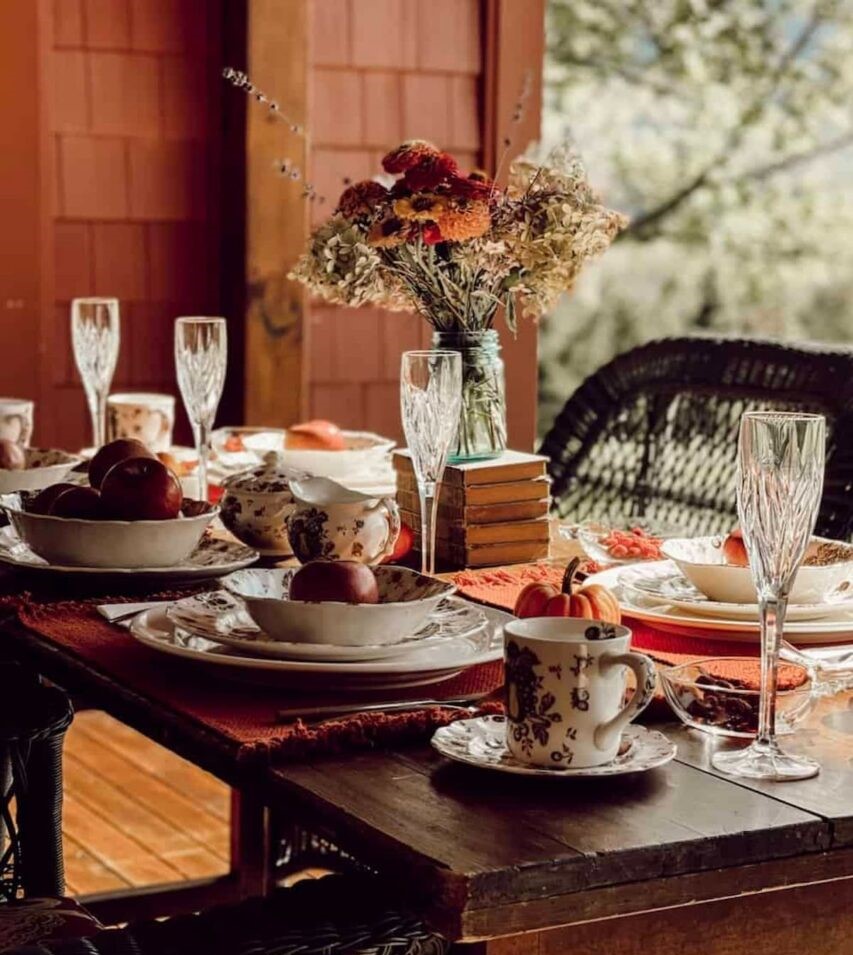
What are the best thrift store items to look for to create a fall aesthetic?
Focus on shape and material over color — fall tones are easy to add with spray paint or styling. Best thrift finds for fall include: brass or copper candlesticks, wooden trays and bowls (great for displaying gourds or acorns), glass hurricane vases (pair with LED candles or dried botanicals), ceramic pitchers and crocks (perfect for dried stems), and woven baskets in any condition. Avoid anything cracked along edges or showing mold — those are not worth the effort.
How much should I expect to spend on a thrift store fall decor haul?
A solid thrift store fall decor haul for an average living room typically runs $15-$35 total, covering 8-12 pieces. Individual items generally range from $0.50 for small glass pieces to $5-$8 for larger statement items. Add a $3-$5 can of spray paint and free natural elements from outside (acorns, branches, pinecones), and you can style an entire room for well under $50 — compare that to $200+ at a retail home decor store.
For more thrift store transformation ideas beyond fall decor, check out my guide to thrift store living room makeovers — same principles, year-round results.
Ready to start your own thrift store transformation adventure? Share your best finds and transformations in the comments—I love seeing how these techniques work with different pieces and styles!
This week’s new articles:
- Small Space Fall Decorating: Maximum Impact, Minimal Budget (Monday)
- DIY Fall Pillow Covers: No-Sew Options Under $10 (Wednesday)
More budget fall decorating:
- Fall Mantel Styling: 6 Looks for Under $30 Each
- Cozy Bathroom Updates: 12 Fall Touches Under $40
- DIY Pumpkin Alternatives: 10 Budget Fall Centerpieces
Leave a Reply