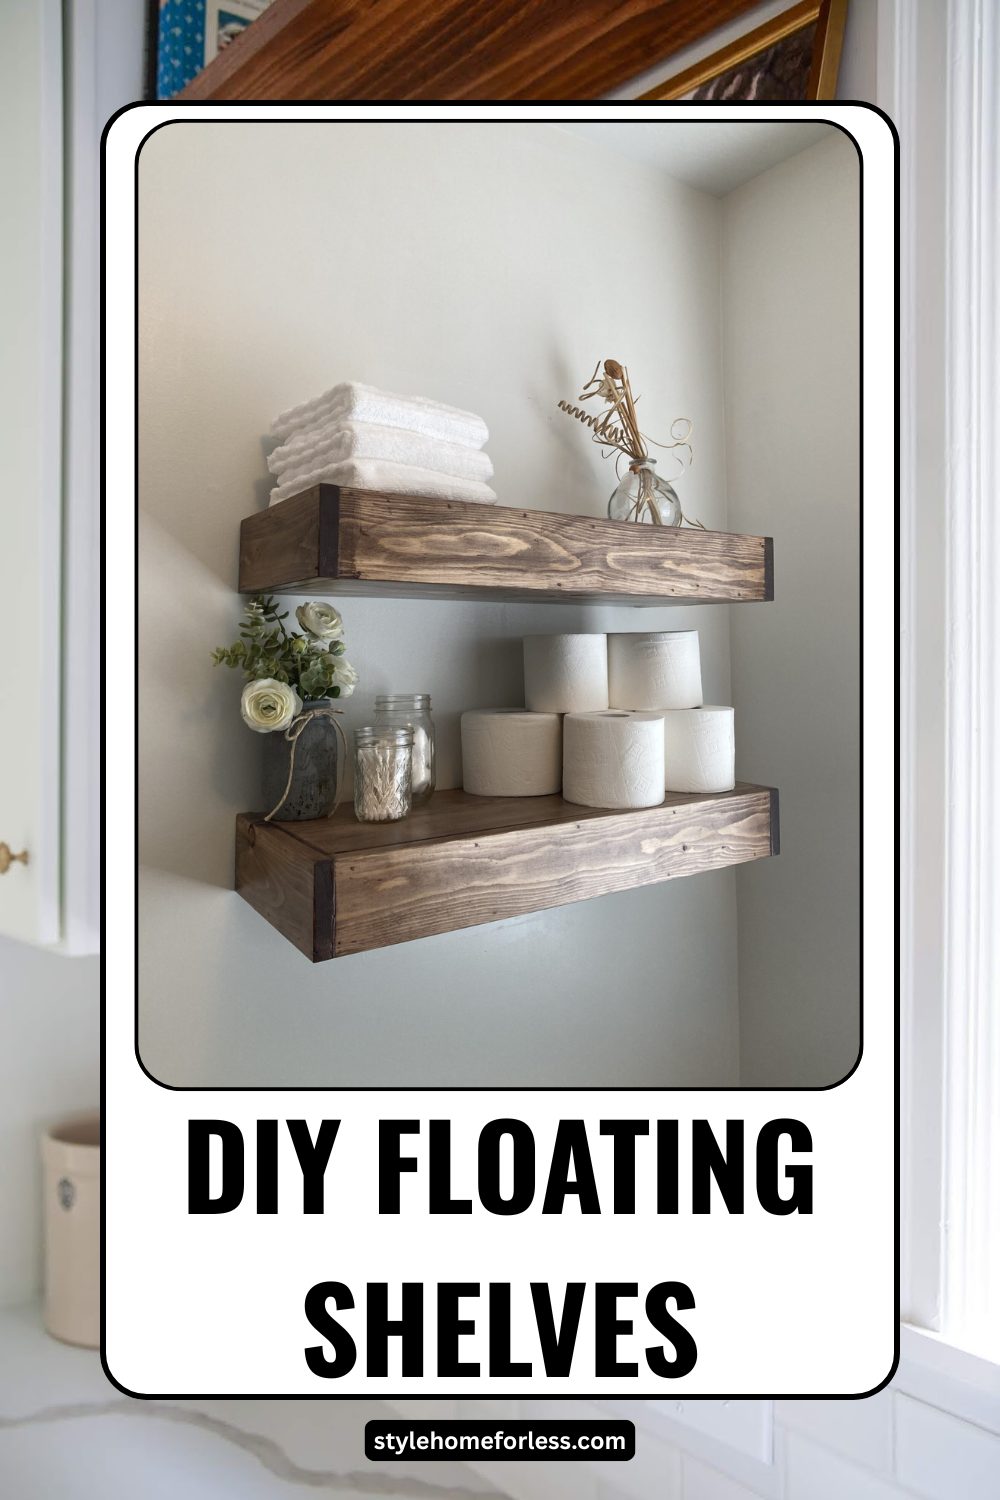
Three weeks ago, I was standing in my living room, staring at this awkward blank wall next to my couch, when my neighbor Mike wandered over with his coffee.
“You know what that wall needs?” he said, gesturing with his mug. “Some floating shelves. Really opens up a space.”

I nodded like I totally agreed, but internally I was doing math. The floating shelves at Target were $45 each. For the three I wanted, we’re talking $135. Plus installation. Plus the inevitable “while we’re at it” purchases that somehow always happen.
Mike continued, “I built some last month for like fifteen bucks each. Easier than you’d think.”
Wait, what now?
That conversation sent me down a rabbit hole of YouTube tutorials, Pinterest boards, and way too many trips to Home Depot. Three methods, countless test runs, and several colorful vocabulary moments later, I’ve cracked the code on DIY floating shelves that look expensive but don’t require a construction loan.
Here’s everything I learned, including the spectacular failures you can avoid.
Why Store-Bought Floating Shelves Make Your Wallet Cry
Let’s talk numbers for a hot second. Quality floating shelves run $30-80 EACH at major retailers. The “affordable” ones from discount stores? They sag after three months and look it.
I priced out shelving for my entire living room: $340 for four shelves. For pieces of wood with brackets. That seemed… excessive.
But here’s what really got me: most expensive floating shelves are just basic lumber with hidden hardware. The markup is insane when you break down the actual materials.
The retail markup reality check:
- $45 Target shelf = $8 worth of materials + $37 markup
- $65 West Elm shelf = $12 worth of materials + $53 markup
- $85 Pottery Barn shelf = $15 worth of materials + $70 markup
Once I realized I was paying for the name on the packaging rather than complicated engineering, DIY became the obvious choice.
Plus—and this matters—DIY means custom lengths. No more “close enough” sizing or trying to make standard dimensions work in weird spaces.
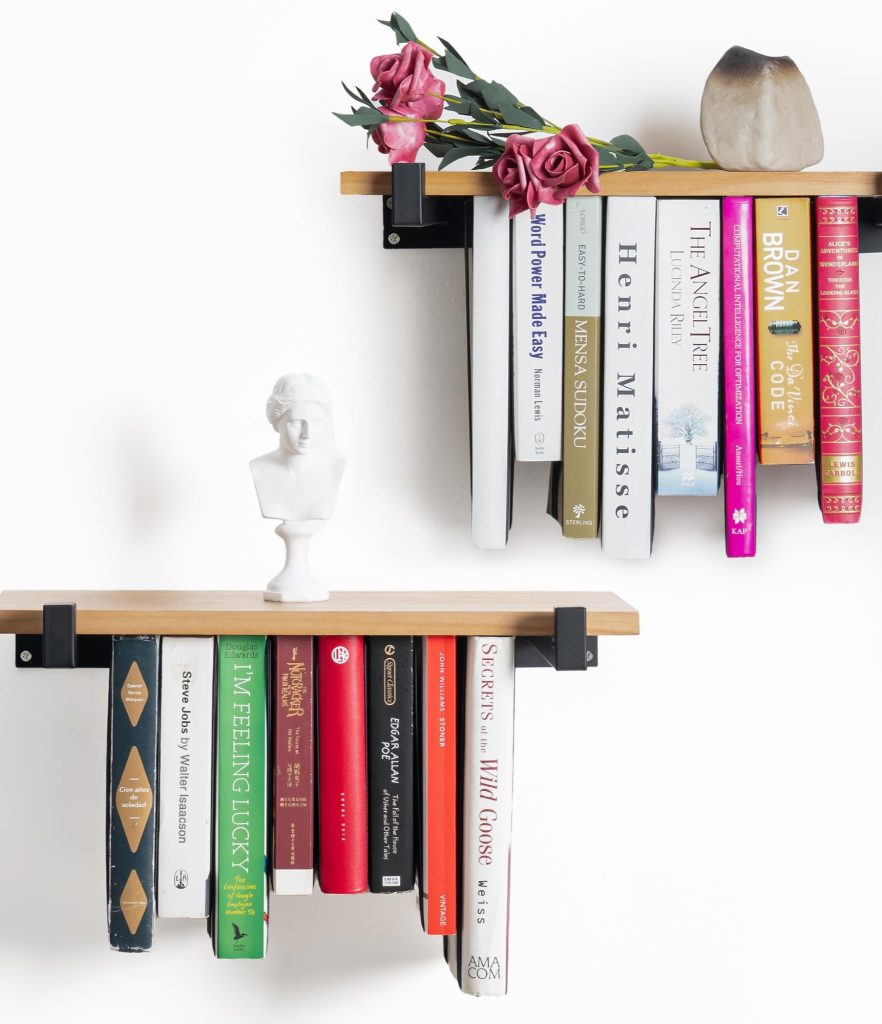
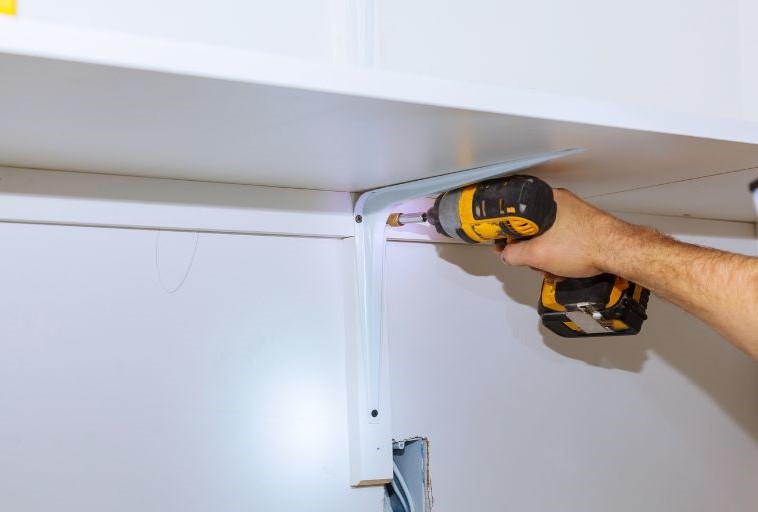
Method 1: The Classic Hidden Bracket System ($18 per shelf)
Skill Level: Beginner to Intermediate
Time Required: 45-60 minutes per shelf
Tools Needed: Drill, level, stud finder, measuring tape
This is your bread-and-butter floating shelf method. Looks completely professional, supports decent weight, and uses materials available at any hardware store.
Materials List (Per Shelf):
- 1×6 pine board, cut to desired length: $8-12
- Heavy-duty L-brackets (2): $4
- Wood screws (2.5″): $1
- Wall anchors: $2
- Wood stain or paint: $3
Total per shelf: $18-22
Step-by-Step Process:
Step 1: Planning and Measuring (10 minutes) Measure your wall space and decide on shelf length. I learned this the hard way: measure twice, buy once. My first shelf was two inches too long for the space I wanted it in.
Mark bracket placement on your shelf. For shelves up to 24 inches, two brackets work fine. Longer shelves need three brackets for proper support.
Step 2: Creating the Hidden Channel (15 minutes) This is where the magic happens. You’re creating a channel in the back of your shelf that slides over the bracket arms.
Using a drill with a spade bit, create a horizontal channel about 1 inch deep and as wide as your bracket arm. Start the hole about 2 inches from each end.
Pro tip: Practice on scrap wood first. I went too deep on my initial attempt and nearly went through the front of the shelf.
Step 3: Wall Installation (20 minutes) Use a stud finder to locate wall studs. For heavy items, you want at least one bracket hitting a stud. Mark your bracket locations with a level—crooked shelves are impossible to ignore once they’re up.
Drill pilot holes and install brackets. Test by pulling on them. If they wiggle, you need better anchors or different placement.
Step 4: Finishing and Mounting (15 minutes) Sand your shelf smooth and apply stain or paint. I use pre-stain wood conditioner for even color, but that’s optional if you’re going for a rustic look.
Once dry, slide your shelf onto the brackets. The channel you created should fit snugly over the bracket arms, creating that “floating” appearance.
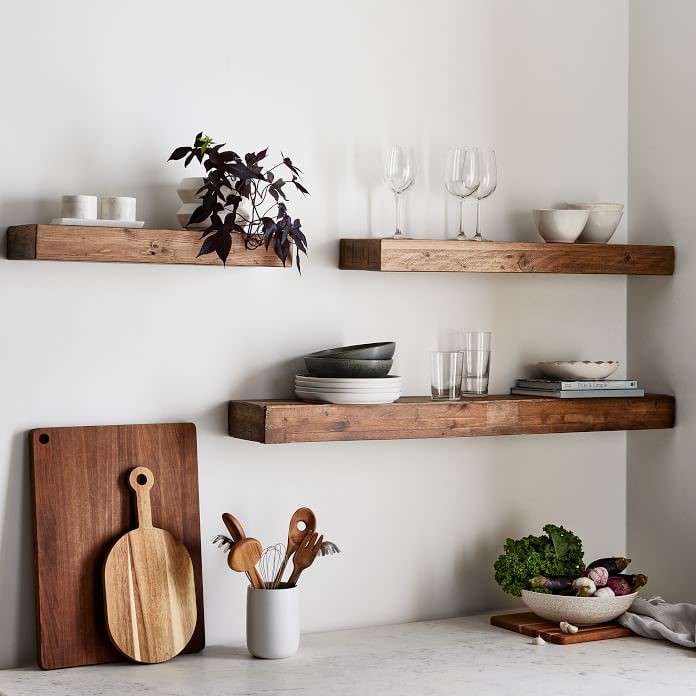
What Actually Works:
My living room has three of these shelves holding books, plants, and decorative objects. They’ve been up for eight months with zero sagging issues.
Common Mistakes I Made:
- Channel too shallow: Shelf won’t slide on properly
- Uneven bracket installation: Shelf sits crooked (measured three times, still got it wrong initially)
- Overloading immediately: Test weight capacity gradually
Method 2: The Rope and Cleat System ($14 per shelf)
Skill Level: Beginner
Time Required: 30-40 minutes per shelf
Tools Needed: Drill, level, measuring tape
This method creates a more rustic, farmhouse look while being the easiest to install. Perfect if you’re intimidated by precise measurements or just want something foolproof.
Materials List (Per Shelf):
- 1×8 pine board, cut to length: $10-14
- Rope (1/2 inch thick): $2
- Wall cleats or hooks (2): $2
Total per shelf: $14-18
Step-by-Step Process:
Step 1: Shelf Preparation (10 minutes) Sand your board smooth. This method shows more of the wood, so finishing matters more.
Drill holes near each end of the shelf, about 2 inches from the edge and 1 inch from the back. Make holes slightly larger than your rope diameter.
Step 2: Wall Cleat Installation (15 minutes) Install cleats or heavy-duty hooks into wall studs. These support the entire weight, so don’t skip finding studs.
Space cleats to match the holes in your shelf. Double-check measurements because adjusting later is annoying.
Step 3: Rope Assembly (10 minutes) Thread rope through shelf holes, creating loops that hang on your wall cleats. Adjust rope length so shelf sits level.
The rope becomes part of the design, so choose natural fiber rope that looks intentional rather than utilitarian.
What Actually Works:
I used this method in my kitchen for a spice display shelf. The rope detail adds character, and it’s held steady for six months despite daily use.
The rustic appearance works especially well in farmhouse or cottage-style spaces. My guests consistently ask about this shelf specifically.
Styling Tips:
- Use this method where the rope will complement your décor style
- Natural jute rope looks more expensive than synthetic alternatives
- Consider the rope as an design element, not just function
Method 3: The Reclaimed Wood Floating Ledge ($16 per shelf)
Skill Level: Intermediate
Time Required: 60-75 minutes per shelf
Tools Needed: Saw, drill, sandpaper, level
This creates the chunkiest, most substantial-looking floating shelf. Perfect for displaying heavier items or creating dramatic visual impact.
Materials List (Per Shelf):
- 2×8 lumber, cut to length: $12-16
- French cleat hardware: $4
Total per shelf: $16-20
Step-by-Step Process:
Step 1: Wood Selection and Prep (20 minutes) Choose lumber with interesting grain patterns or character marks. The chunky dimension makes imperfections look intentional.
Sand thoroughly, starting with 120-grit and finishing with 220-grit paper. This lumber shows more, so smooth finish matters.
Step 2: French Cleat Installation (25 minutes) French cleats are interlocking pieces that create incredibly strong wall mounting. One piece mounts to the wall, the other to your shelf.
Route or chisel a channel in the back of your shelf for the cleat hardware. This keeps the mounting system completely hidden.
Install the wall cleat into at least two studs. These shelves can support significant weight when properly mounted.
Step 3: Finishing and Mounting (30 minutes) Apply your chosen finish—stain, paint, or natural oil. The chunky dimension looks great with darker stains or even painted finishes.
Once dry, hook the shelf cleat onto the wall cleat. The interlocking design creates an incredibly secure connection.
What Actually Works:
My home office has two of these holding books and office supplies. They look like they cost $100+ each and support way more weight than the other methods.
The substantial appearance makes them perfect for masculine or industrial décor styles. They also work great in spaces where you need serious weight capacity.
Advanced Tip:
Distress the edges slightly with sandpaper for an aged look. Add metal brackets as decorative elements (not structural—the cleat does the work).
Cost Comparison: DIY vs. Store-Bought
Let me break down real numbers from my actual projects:
My Living Room Project (4 shelves, 36″ each):
DIY Method 1: $72 total ($18 x 4)
Target equivalent: $180 ($45 x 4)
West Elm equivalent: $260 ($65 x 4)
Pottery Barn equivalent: $340 ($85 x 4)
Savings: $108-268 depending on retail comparison
Installation costs if hiring professionals:
DIY: $0 (plus weekend time)
Professional installation: $75-150 per shelf
The math gets even better with multiple shelves. My total investment was $72 for shelves that would have cost $340+ retail, plus installation.
Tool Investment Reality Check
You might be thinking, “But I don’t own these tools!” Fair point. Let’s talk realistic tool costs:
Essential tools you’ll actually use again:
- Drill: $25-40 for decent cordless model
- Level: $8-12 for basic 24″ version
- Stud finder: $15-25 for reliable model
- Measuring tape: $6-10 for 25-foot version
Total tool investment: $54-87
But here’s the thing: these tools pay for themselves quickly. Use them for this project plus future home improvements, and you’re money ahead versus hiring professionals.
Borrowing vs. buying strategy:
- Drill: Worth buying—you’ll use constantly
- Level: Worth buying—multiple home uses
- Stud finder: Worth buying—essential for any wall mounting
- Specialty tools: Borrow or rent for single-use situations
I borrowed my neighbor’s router for the French cleat channels rather than buying one I’d rarely use.
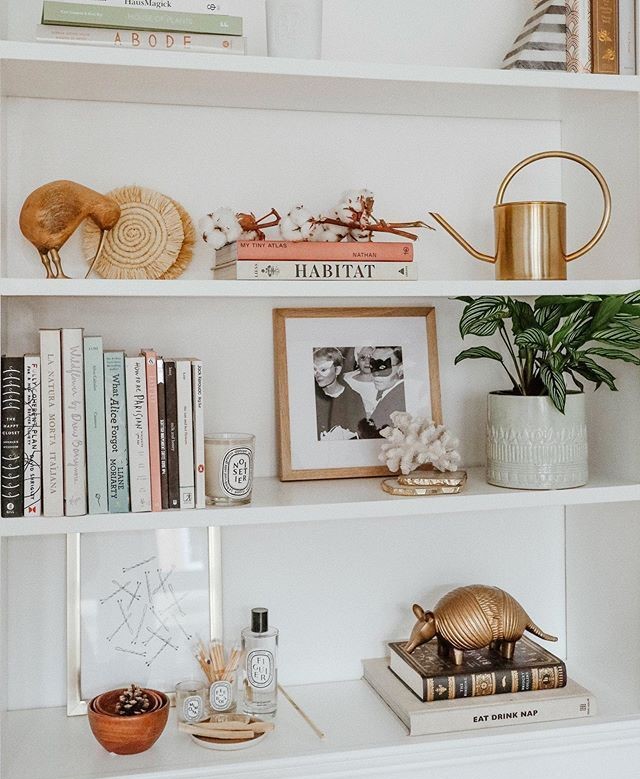
Styling Your DIY Floating Shelves Like a Pro
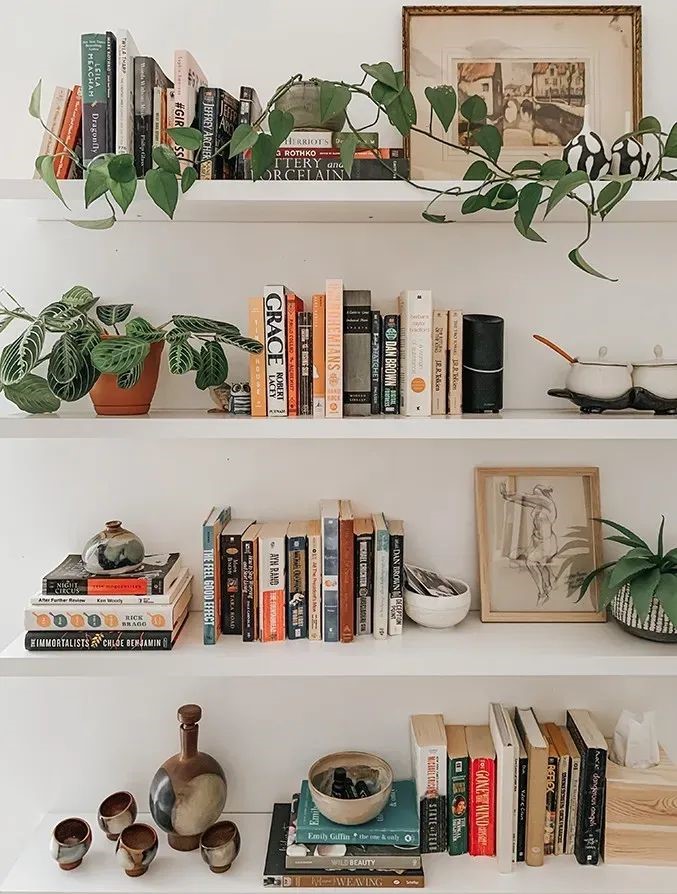
Building the shelves is only half the battle. Styling them properly makes the difference between “looks homemade” and “looks custom.”
The Rule of Thirds for Shelf Styling:
Divide your shelf into three sections visually. Vary heights and groupings across these sections for natural, professional appearance.
Left third: Taller item (plant, vase, or books)
Middle third: Medium-height grouping (2-3 smaller items)
Right third: Low, horizontal element (tray with objects, single book)
Color and Texture Mixing:
- Limit color palette: 3-4 colors maximum across all shelf styling
- Mix textures: Smooth ceramics, rough wood, soft textiles, shiny metals
- Vary shapes: Round, square, organic forms create visual interest
My Biggest Styling Mistakes:
All items same height: Looks like a lineup rather than curated display Too much stuff: Empty space is as important as filled space
No personal elements: Include meaningful objects, not just pretty things
Seasonal Styling Strategy:
Use your floating shelves for seasonal displays without commitment of permanent décor. Swap objects quarterly to keep spaces feeling fresh.
Spring: Fresh flowers, light colors, natural elements
Summer: Beach finds, bright colors, casual elements Fall: Warm colors, harvest elements, cozy textures Winter: Metallic accents, evergreen elements, candles
Troubleshooting Common DIY Disasters
After helping three friends with their floating shelf projects, I’ve seen every possible thing go wrong. Here’s how to avoid or fix the most common issues:
Problem: Shelf Sags in the Middle
Cause: Insufficient support for shelf length or weight
Solution: Add center bracket or reduce load
I learned this with a 48-inch shelf holding books. Two brackets weren’t enough. Added a third bracket in the center, problem solved.
Problem: Shelf Sits Crooked
Cause: Uneven bracket installation
Solution: Remove and reinstall with better measuring
Use a level for initial installation. Mark lightly with pencil before committing to holes. Triple-check measurements.
Problem: Visible Brackets Ruin the “Floating” Look
Cause: Bracket placement or shelf design issues
Solution: Adjust shelf depth or bracket positioning
The bracket arms should be completely hidden within your shelf channel. If visible, your channel needs to be deeper or differently positioned.
Problem: Shelf Pulls Away from Wall
Cause: Inadequate wall anchors or missed studs
Solution: Better anchors or relocated installation
Heavy items require stud mounting. Toggle bolts work for hollow walls but have weight limits. Know your wall type before choosing anchors.
Problem: Wood Split During Installation
Cause: No pilot holes or wrong screw size
Solution: Always drill pilot holes, especially near board ends
I split my first shelf by rushing screw installation. Pilot holes prevent splits and make screws easier to drive.
Safety Considerations (The Boring but Important Stuff)
Weight Limits by Method:
Method 1 (Hidden Brackets): 30-40 lbs per shelf when properly installed Method 2 (Rope System): 15-25 lbs per shelf (rope is limiting factor)
Method 3 (French Cleat): 50+ lbs per shelf (strongest option)
Test weight capacity gradually. Start with lighter items and add weight slowly.
Wall Type Considerations:
Drywall: Use appropriate anchors for wall thickness Plaster: Pre-drill to prevent cracking, use masonry anchors
Brick/Concrete: Masonry bits and anchors required
Metal studs: Special anchors designed for metal framing
Know your wall construction before starting. Wrong anchors cause failures.
Electrical and Plumbing Awareness:
Always check for wires and pipes before drilling into walls. Use a stud finder with electrical detection capability.
I once nearly drilled into a cable line. That would have been an expensive “oops.”
The Real-World Performance Report
Six months after installing floating shelves throughout my house using these methods, here’s the honest assessment:
What’s Held Up Great:
- Living room shelves (Method 1): Zero sagging, still perfectly level
- Kitchen shelf (Method 2): Rope has aged beautifully, no structural issues
- Office shelves (Method 3): Support heavy books without any movement
What Required Adjustment:
- Bathroom shelf: Humidity caused slight wood movement, needed tightening
- Bedroom shelf: Overloaded initially, had to redistribute weight
Cost Per Use Analysis:
Total investment: $108 for six shelves
Professional equivalent: $600+ installed
Usage: Daily (books, plants, décor storage)
Cost per use after six months: Basically nothing
These shelves function exactly like expensive retail versions while costing a fraction. The DIY satisfaction factor is just a bonus.
Customization Ideas for Advanced DIYers
Once you master the basic methods, customization options are endless:
Integrated Lighting:
Run LED strip lights underneath shelves for dramatic uplighting. Creates floating effect and provides task lighting.
Built-in Charging Stations:
Route holes for charging cables, keeping devices powered while displayed on shelves.
Seasonal Hardware:
Use removable decorative brackets that change with seasons—wrought iron for fall, painted wood for spring.
Mixed Materials:
Combine wood with metal pipes, glass, or stone for unique aesthetic approaches.
Long-Term Maintenance and Care
Monthly (5 minutes):
- Dust surfaces and check for any loosening
- Redistribute weight if items have shifted
- Clean according to finish type (wood oil, painted surface, etc.)
Seasonally (15 minutes):
- Check mounting hardware for tightness
- Touch up finish if needed
- Reassess weight distribution and usage patterns
Yearly (30 minutes):
- Complete inspection of mounting system
- Refinish wood surfaces if desired
- Update styling and organization
Proper maintenance keeps DIY shelves looking and performing like expensive retail versions indefinitely.
Material Quality: Where to Splurge vs. Save
Worth the Extra Money:
Hardware: Good brackets and anchors prevent failures Stain/Paint: Quality finishes last longer and look better
Sandpaper: Sharp paper creates smooth finishes faster
Where to Save:
Lumber: Construction grade pine works fine for most applications Tools: Basic versions work for occasional DIY use Decorative elements: Function matters more than fancy details
I spent an extra $3 per shelf on better wood stain and it made a huge difference in final appearance.
Making It Work in Different Home Styles
Modern Minimalist:
- Clean lines, no visible hardware
- Light wood or painted finishes
- Minimal styling with geometric objects
Farmhouse/Rustic:
- Thicker lumber with character marks
- Natural or distressed finishes
- Mix of functional and decorative items
Industrial:
- Metal bracket accents (decorative only)
- Darker stains or painted finishes
- Display items with industrial materials
Traditional:
- Classic proportions and spacing
- Rich wood stains
- Symmetrical styling with classic objects
The same basic construction methods adapt to any style through finish choices and styling decisions.
Final Reality Check: Is DIY Right for You?
DIY floating shelves make sense if:
- You want custom sizes unavailable retail
- Budget is a significant factor
- You enjoy hands-on projects
- You have basic tool access
- Timeline isn’t urgent (allow weekend for project)
Professional installation makes sense if:
- Time is more valuable than money savings
- Complex wall conditions (multiple materials, electrical concerns)
- Installing many shelves (economies of scale for pros)
- Zero interest in DIY projects
For most people in most situations, DIY offers better value and complete customization control.
What I Wish I’d Known Before Starting
Start with one shelf in a low-visibility area to test your skills and method preferences. My first attempt was in the main living room—bold choice that worked out, but risky.
Measure wall stud spacing before planning shelf locations. Stud placement often dictates optimal shelf positioning more than aesthetic preferences.
Buy extra materials for mistakes and future projects. Having spare brackets and lumber on hand prevented mid-project store runs when things went sideways.
Take progress photos for future reference. Documentation helps when friends want similar projects or you’re doing maintenance.
The satisfaction factor is real. Every guest compliment feels better knowing you built these yourself for a fraction of retail cost.
Your Next Steps
Pick one location that’s been bothering you—that blank wall, awkward corner, or cluttered surface that needs better organization. Start with Method 1 if you want professional results, Method 2 if you prefer easier installation, or Method 3 if you want maximum visual impact.
Buy materials for one shelf, not your entire house. Master the technique, then expand once you’re confident in your skills.
Remember: the goal isn’t perfection on your first try. It’s creating functional, attractive storage that serves your specific needs at a price that doesn’t hurt your budget.
These floating shelves have transformed how I use wall space throughout my house. They’ve provided storage, display opportunities, and design elements that make rooms feel more finished and intentional.
The best part? Every time someone asks where I bought them, I get to say “I made them.” That never gets old.
Frequently Asked Questions
How much weight can DIY floating shelves hold?
Weight capacity depends on your method and wall type. Method 1 (hidden brackets into studs) safely holds 30–40 lbs per shelf. Method 2 (rope system) handles 15–25 lbs. Method 3 (French cleat) is the strongest at 50+ lbs when properly mounted into two studs. Always test weight gradually — start light and add items over a few days rather than loading everything at once.
Do I need to find wall studs to install floating shelves?
For shelves holding more than lightweight decorative items, yes — hitting at least one stud per shelf is strongly recommended. Toggle bolts and heavy-duty drywall anchors can work for lighter loads, but studs are your safest bet. A $15–$25 stud finder pays for itself on the first project. If you’re also planning a bigger room organization project, you might want to pair your new shelves with some of the storage solutions in our dollar store kitchen organization review — great ideas for under-shelf bins and hooks.
What’s the cheapest way to build floating shelves?
Method 2 (rope and cleat system) comes in around $14 per shelf and is the most beginner-friendly option. If you have basic lumber-cutting access, you can get the material cost down further by buying an 8-foot 1×6 pine board (~$8) and cutting it into your needed lengths. Pair that with $3 rope and $2 wall hooks and you’re under $15 total. The rope style also pairs beautifully with DIY décor — see our roundup of dollar store DIY projects for accessories to style your new shelves on a budget.
Ready to tackle your first floating shelf project? Share your planned locations and method choices in the comments—I love seeing how these techniques adapt to different spaces and styles!
Coming up next week: 10 Genius IKEA Hacks for Small Spaces Under $30. Because sometimes the best DIY starts with smart shopping. Hit subscribe so you don’t miss it!
You might also enjoy:
Leave a Reply