I’m sitting here drinking my third cup of coffee this morning, staring at the plastic spider that’s somehow still stuck to my kitchen window from last year’s Halloween disaster, and I realized I need to tell you about my centerpiece catastrophe of 2022.
Because apparently I’m the kind of person who learns things the hard way and then shares those lessons with the internet.
So picture this: It’s October 2022, and I’ve decided—completely out of nowhere—that I’m going to host Halloween dinner. Not just like, “hey, want to come over for spaghetti on Halloween?” No, I’m talking themed dinner. Fancy. Pinterest-worthy. The kind of meal that would make my mother-in-law finally admit I might actually know what I’m doing as an adult human.
Spoiler alert: I did not know what I was doing.
I spent WEEKS planning this centerpiece. WEEKS. I had a Pinterest board called “Spooky Elegant” that had 47 pins. I made lists. I watched YouTube tutorials. I bought supplies from three different stores because apparently I thought the Dollar Tree plastic spiders weren’t high-quality enough for my vision.
The morning of the dinner, I woke up at 6 AM to start setting up. I had dry ice—DRY ICE—that I bought from this sketchy gas station because the nice places were closed on Sunday morning. I had fake blood (food grade, because I’m not completely insane). I had these elaborate candelabras that I borrowed from my neighbor Margaret, who definitely thinks I’m weird but was trying to be supportive.
By 2 PM, my dining room looked like a cross between a witches’ coven meeting and a CSI crime scene. I had test tubes filled with colored water labeled “Dragon’s Blood” and “Witch’s Brew.” There were plastic spiders positioned “artistically” (my word, not anyone else’s). The dry ice was bubbling in these black cauldrons, creating this amazing fog effect that made everything look mysterious and expensive.
I took about 30 photos and immediately posted one to Instagram with the caption “Halloween dinner ready! ✨🎃” because I was so proud of myself.
Then people started arriving.
My mother-in-law walked in first—because of course she did—took one look at my masterpiece, and her face went through this series of expressions that I can only describe as “confused, concerned, and then diplomatically blank.”
“Oh,” she said, in that tone that mothers-in-law use when they’re trying really hard to be supportive. “Oh my. This is… this is very… atmospheric.”
Then she paused, looked around the room, and added, “Should we maybe eat in the kitchen instead? You know, to preserve all your hard work?”
PRESERVE MY HARD WORK. Like it was some kind of museum exhibit that was too precious for actual use.
My dad walked in next and immediately started laughing. Not like “oh how fun” laughing. Like “I can’t believe my daughter did this” laughing.
“Jesus, honey,” he said, “are we eating dinner or solving a murder?”
But the real moment of truth came when my kids saw it. My 8-year-old, who usually thinks everything I do is amazing, took one look and said, “Mommy, this is really scary. Do we have to eat here?”
My 5-year-old just started crying.
CRYING. At my beautiful, Pinterest-worthy, three-hours-of-my-life Halloween centerpiece.
And then—THEN—we sat down to eat and discovered that dry ice, while visually stunning, makes everything around it slightly damp. And it has this weird chemical smell that definitely doesn’t enhance pot roast. Plus, every time someone reached for the salt, they bumped into a test tube or knocked over a carefully positioned spider.
My husband kept shooting me these looks across the table like “honey, what were you thinking?” but trying to be supportive because he loves me and didn’t want to hurt my feelings in front of everyone.
Twenty minutes into dinner, my mother-in-law very politely suggested that maybe we’d be “more comfortable” eating in the living room. You know, where there weren’t any fake crime scene decorations.
We ended up eating pizza off paper plates while sitting on the couch, and my elaborate centerpiece sat alone on the dining room table like some kind of abandoned art project.
I found my husband later that night, standing in the dining room doorway just staring at the whole setup.
“It really does look incredible,” he said, which was sweet but not particularly helpful at that point. “Maybe next year we go for ‘festive’ instead of ‘potential health hazard’?”
That’s when I realized I had completely missed the point of Halloween table decorating.
The Thing Nobody Tells You About Holiday Centerpieces
Here’s what I figured out after that disaster: Halloween centerpieces need to make people want to sit at your table and eat food, not question your mental state or worry about their safety.
Like, I spent so much time making it look cool that I forgot people actually had to exist around it. They needed to be able to see each other across the table without leaning around fake body parts. They needed to feel comfortable passing the mashed potatoes without knocking over test tubes. They definitely shouldn’t have to worry about accidentally inhaling mysterious fog.
But it also needed to feel Halloween-y enough that we weren’t just eating regular dinner with a few orange napkins and calling it themed.
So I became accidentally obsessed with figuring this out. The next year, I tested eight different centerpiece ideas on my poor, patient family. Some worked. Some were disasters. One resulted in my 6-year-old asking, “Mom, why did you put bugs on our dinner table?” for three weeks straight.
Here’s what actually happened:
The Great Centerpiece Experiment of 2023 (Ranked by How Badly I Messed Up)
Attempt #1: “Maybe Just… Black Candles?”
Okay, so after the dry ice incident, I decided to start simple. Like, embarrassingly simple. Three black taper candles in our regular candlesticks, some mini pumpkins from Kroger scattered around them.
That’s it. That was my whole plan.
I set it up and immediately felt like I was cheating somehow. Like, where was the creativity? The Pinterest-worthy complexity? This looked like something a normal person would do.
But then we sat down for dinner and… it worked. It just worked. The black candles made everything feel Halloween-y without being scary. The candlelight was actually really pretty. People could see each other, pass food normally, and have regular conversations.
My mother-in-law—the same woman who diplomatically suggested we eat in the kitchen the year before—actually complimented it. “Oh, this is lovely,” she said. “Very elegant.”
ELEGANT. She used the word elegant about something I threw together in five minutes with grocery store pumpkins.
What it cost me: $8 total ($3 for candles, $5 for pumpkins)
What went wrong: Literally nothing. Which was almost more stressful than things going wrong, because I kept waiting for the other shoe to drop.
Kid reaction: My 8-year-old asked why the candles were black, got a two-sentence explanation, and then completely ignored them for the rest of dinner. In parent language, this means “total success.”
Would I do it again? This is now my backup plan for every Halloween dinner until the end of time.
Attempt #2: “Gothic Garden Party” (Or: The Raven Feather Situation)
Feeling confident after the candle success, I decided to get a little more creative. I had this long wooden tray that usually holds mail and my keys and random kid stuff, and I thought, “What if I turn this into an elegant fall arrangement with just a hint of spooky?”
So I filled it with these gorgeous deep purple mums and burgundy flowers from Home Depot, added some mini pumpkins, and then—because I’m apparently incapable of leaving well enough alone—I added these plastic ravens I found at Dollar Tree.
It looked AMAZING. Like, legitimately beautiful. The colors were rich and sophisticated, the ravens added just enough Halloween without being terrifying, and the whole thing had this autumn-meets-Edgar-Allan-Poe vibe that I was really proud of.
My sister-in-law came over, took one look, and said, “Did you hire someone to do this? It looks so professional!”
PROFESSIONAL. Like I knew what I was doing.
But then we started eating dinner, and I noticed these tiny black things floating in my salad. Tiny. Black. Things.
The ravens were shedding feathers.
Not like, obvious feathers that you’d notice right away. Tiny microscopic feathers that were apparently getting picked up by the air circulation and distributed around our food.
I spent the entire meal discretely picking black specks out of my dinner and hoping nobody else noticed. My husband definitely noticed—he kept giving me these questioning looks—but he didn’t say anything until later.
“Honey,” he said while we were doing dishes, “there was a small black feather in my mashed potatoes.”
“How small?” I asked, like that mattered.
“Small enough that I almost ate it.”
What it cost me: $12 ($6 for flowers, $4 for pumpkins, $2 for molting ravens)
What went wrong: Decorative ravens are apparently not dinner-table quality. Who knew?
Kid reaction: They spent the entire dinner playing “spot the raven” and making up elaborate stories about what the ravens were discussing. Actually pretty adorable.
Would I do it again? Yes, but I’m hot-gluing every single feather down first.
Attempt #3: “Mason Jar Witch Potions” (AKA: The Cobweb Catastrophe)
This one seemed foolproof. Mason jars—I had five clean ones, which felt like a minor miracle—filled with battery-operated string lights. Add some plastic spiders, fake cobwebs, little labels saying “Love Potion” and “Troll Tears,” scatter candy corn around the base. Whimsical! Interactive! What could go wrong?
I spent a Saturday afternoon setting this up while my kids were at their grandparents’, feeling very crafty and accomplished. The lights looked magical in the jars, the labels were cute, and the whole thing had this fairy-tale-witch vibe that I thought was pretty clever.
The kids came home and absolutely lost their minds with excitement. “MOM! You made POTIONS! Can we drink them? What do they taste like? Are they magic?”
For the first fifteen minutes of dinner, it was perfect. The lighting was lovely, the kids were engaged, everyone was having fun.
Then the fake cobwebs started their reign of terror.
I don’t know what it is about fake cobwebs, but they apparently have a life of their own. They started sticking to everything. The serving spoons. People’s sleeves. My hair. Somehow—and I still don’t understand how this happened—a piece of fake cobweb ended up INSIDE my wine glass.
By the end of dinner, we all looked like we’d been exploring an actual haunted house. My mother-in-law had cobweb strands hanging from her cardigan. My dad found cobweb pieces in his water glass. I’m pretty sure there are still remnants of those cobwebs somewhere in my dining room.
What it cost me: $11 ($4 for lights, $3 for spiders and cobwebs of doom, $1 for printing labels, $3 for candy corn)
What went wrong: Fake cobwebs are apparently sentient and evil. Also, having bowls of candy on the table during dinner with three sugar-obsessed children was… a choice.
Kid reaction: “CAN WE HAVE CANDY NOW? WHAT ABOUT NOW? IS NOW CANDY TIME?” repeated every thirty seconds for the entire meal.
Would I do it again? Absolutely, but I’m never buying fake cobwebs again. They’re banned from my house.
Attempt #4: “Pumpkin Planters Look So Easy on Pinterest”
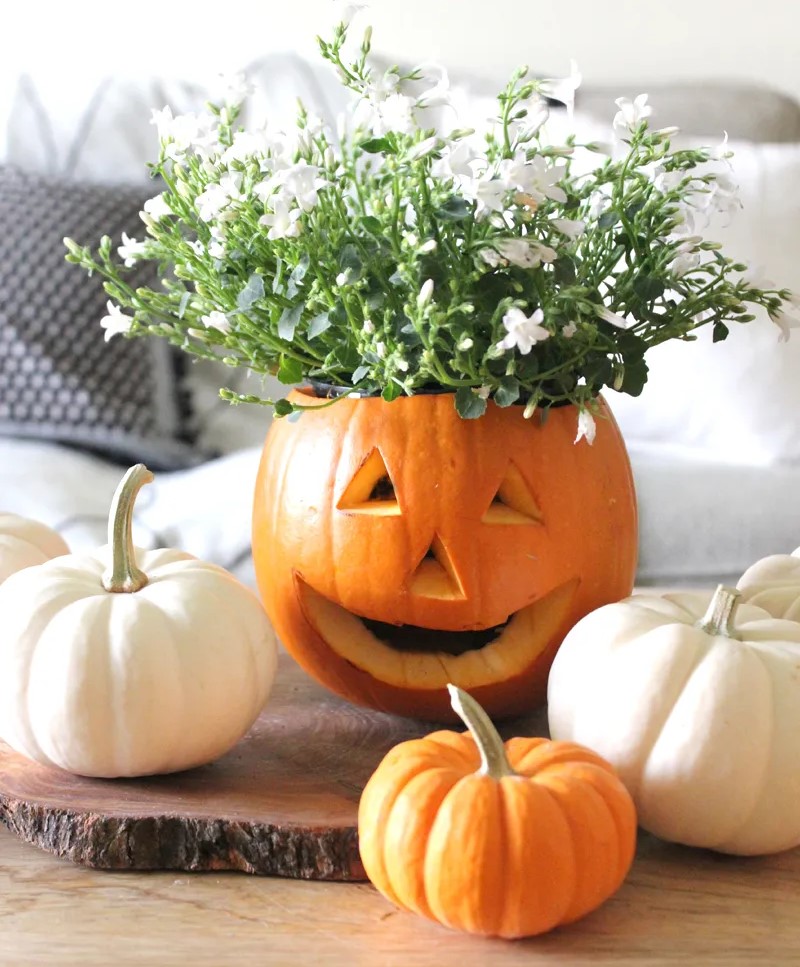
This was inspired by one of those Pinterest posts where someone had turned pumpkins into these adorable little planters filled with fall flowers. It looked simple and elegant and like something I could definitely handle.
I bought three medium pumpkins from the grocery store and spent an entire afternoon carving them out to make planters. And by “carving them out,” I mean hacking at them with various kitchen utensils because I don’t own proper pumpkin-carving tools and apparently didn’t think this through.
But I got them hollowed out, filled them with potting soil and these cute little mums and some trailing ivy, and they looked absolutely gorgeous. Like, Martha Stewart would have been proud gorgeous.
Everyone took pictures. My neighbor asked for a tutorial. I felt like a legitimate decorating genius.
For about a week.
Then the pumpkins started getting soft spots. By week two, one was definitely questionable. By week three, I had fruit flies. FRUIT FLIES. In my dining room.
Also, watering them was a nightmare. Too much water and it leaked onto my table, making everything smell like wet pumpkin. Too little water and the plants died, which defeated the whole purpose.
What it cost me: $14 ($9 for pumpkins, $5 for plants)
What went wrong: Apparently pumpkins rot. Who could have predicted this shocking turn of events?
Kid reaction: They wanted to name all the pumpkin planters. We had “Punky,” “Patch,” and “Princess Pumpkin.” When Princess Pumpkin started getting soft, my 5-year-old was genuinely concerned about her health.
Would I do it again? For special occasions only. And I’m pre-planning the disposal strategy.
Attempt #5: “Interactive Candy Cauldrons Seem Fun”
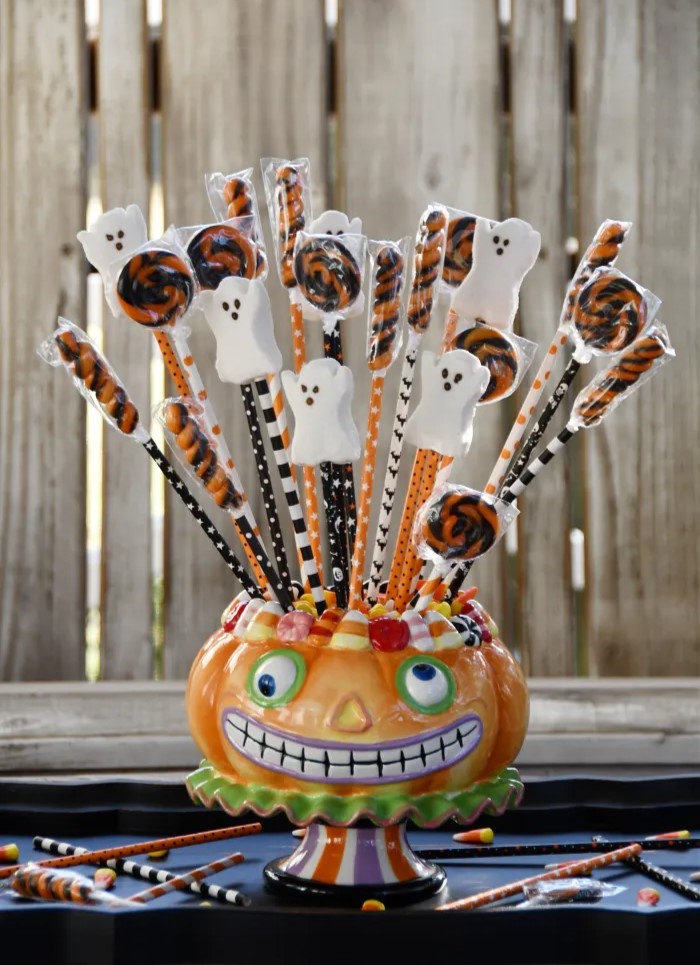
This was supposed to be the fun, family-friendly option. Three little black plastic cauldrons from Dollar Tree, filled with Halloween candy, with this battery-operated humidifier creating a bubbling fog effect.
The visual effect was amazing. The kids were absolutely enchanted. Adults thought it was clever and whimsical. I felt like I’d finally figured out how to do Halloween decorating that was fun without being scary.
Then we tried to eat dinner.
Turns out, humidifiers make everything around them slightly damp. Including the candy. Including our dinner plates. Including the table itself.
Also, having three bowls of Halloween candy on the dinner table during meal time with children was like conducting a psychology experiment in delayed gratification. Except there was no delayed gratification. There was immediate and continuous negotiation.
“Can I have just one piece?”
“Can I have one of each kind?”
“Can I sort the candy by color?”
“Why can’t I eat candy before dinner? It’s Halloween candy, and it’s Halloween!”
By the time we got to dessert, they’d basically had a full sugar meal and were vibrating at frequencies that probably disturbed the neighbors.
What it cost me: $9 ($3 for cauldrons, $6 for candy that became damp and was immediately consumed)
What went wrong: Physics and child psychology, simultaneously.
Kid reaction: Sugar-fueled chaos followed by inevitable crash and tears.
Would I do it again? For Halloween parties where chaos is expected, absolutely. For family dinner, I’ll stick to post-meal candy distribution.
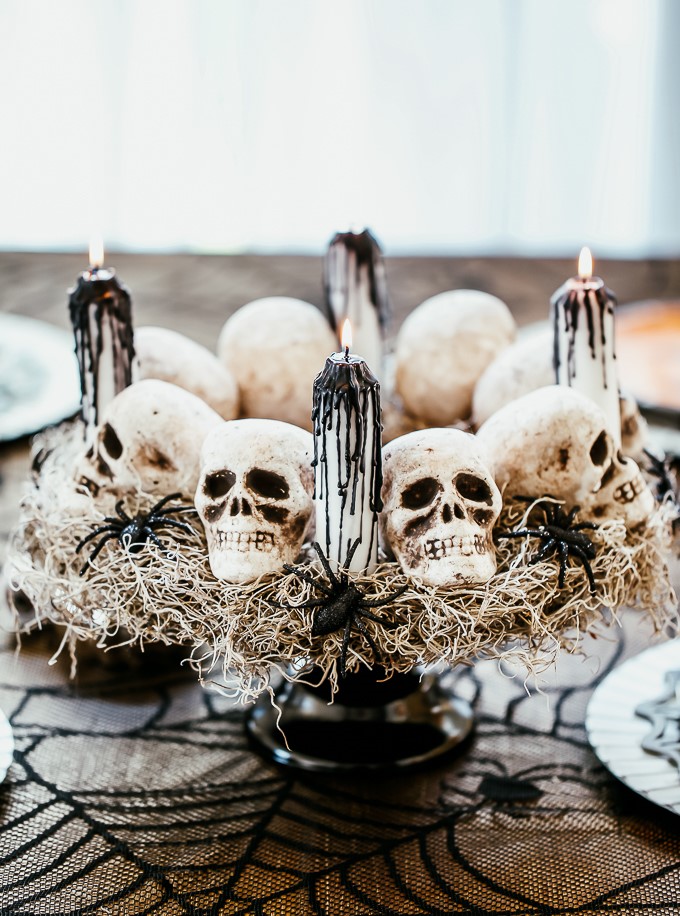
Attempt #6: “Skeleton Dinner Party” (The Trauma Incident)
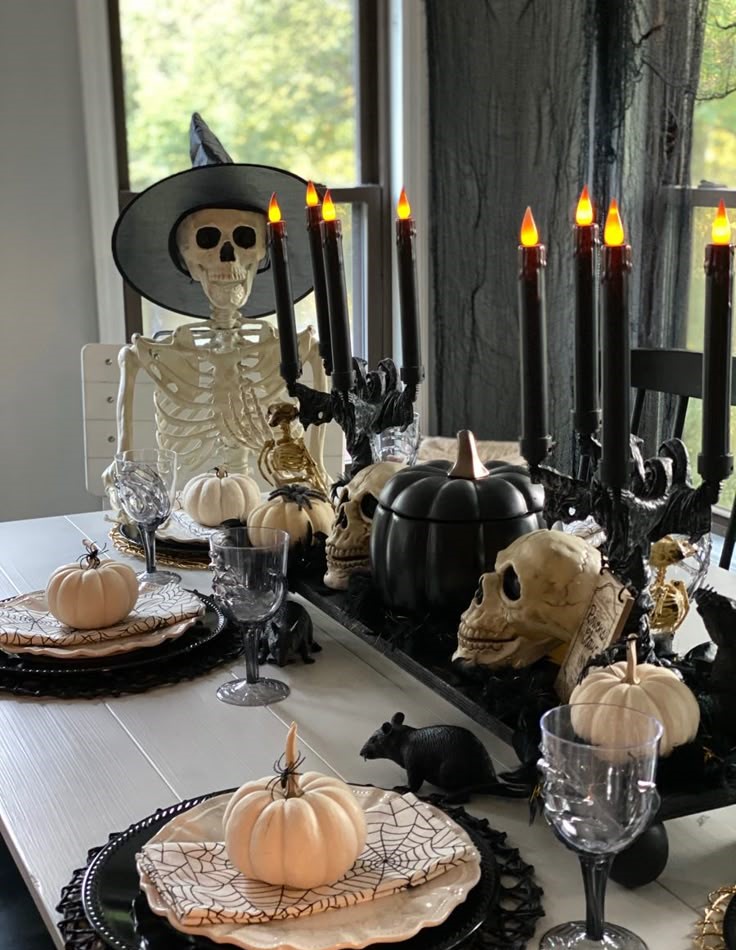
This one seemed so clever in my head. Small plastic skeletons arranged around a mirror like they were having their own little dinner party, battery candles for atmosphere, some fall leaves from our yard scattered around for color.
I took the mirror off our bathroom wall for this—my husband was confused about this decision for WEEKS—and spent an evening arranging tiny skeletons in little dinner party poses. Some were reaching for imaginary food, others were “chatting” with their neighbors. I was very proud of my skeleton choreography.
The adults thought it was hilarious and creative. “Oh, how clever!” my sister said. “They’re having their own Halloween dinner!”
The mirror reflected the candlelight beautifully, making everything look more expensive and thoughtful than it actually was.
Then my 4-year-old nephew came to visit.
He took one look at the skeleton dinner party, processed what he was seeing, and started CRYING. Not just regular crying—the kind of upset crying that makes every adult in the room immediately feel terrible about their life choices.
“Why are there dead people at the dinner table?” he sobbed. “Are they going to eat with us? I don’t want to eat with dead people!”
We tried to explain that they were just decorations, but in his mind, we had invited skeletons to family dinner, and that was absolutely not okay with him.
We ended up covering the skeletons with napkins during the meal, which completely defeated the purpose and made the whole thing look like we had mysterious lumpy objects randomly placed around our table.
What it cost me: $13 ($5 for skeletons, $4 for battery candles, $4 for small pumpkins)
What went wrong: I forgot that not all children think skeletons are fun decorations.
Kid reaction from my own children: “Why are the skeletons having dinner? What do skeletons eat? Can skeletons taste food?”
Would I do it again? Only for adults-only dinners or families with older kids who think skeletons are cool instead of existentially terrifying.
Attempt #7: “Witch’s Herb Garden” (The Overachiever Phase)
This was during my “I’m going to be Pinterest-level creative” phase. The idea was to create a miniature herb garden with little signs that said things like “Eye of Newt” and “Bat Wing” but were actually regular herbs like basil and rosemary.
I used small terra cotta pots from my garage, filled them with herbs from my actual garden, made little signs on cardstock that said “Eye of Newt,” “Dragon Scale,” “Unicorn Tears,” etc. I added plastic toads from Dollar Tree and surrounded everything with moss to create this whimsical witch’s garden centerpiece.
It smelled AMAZING because of the fresh herbs. It sparked conversation all evening. People kept asking about the “real” names of the herbs and guessing what they actually were. I felt genuinely creative and proud of myself.
Plus, I got to use the herbs for cooking later, which felt very practical and adult.
But it took FOREVER to set up. I spent an entire Sunday afternoon making tiny signs and arranging pots and finding the right placement for everything. It was like creating a miniature landscape.
Also, keeping herbs alive on a dining room table turns out to be a daily commitment. They needed water, but not too much water. They needed light, but not direct light. They needed attention, which I am historically bad at giving to plants.
By week two, some of the herbs were looking questionable. By week three, I was basically running a tiny intensive care unit for dying basil plants.
What it cost me: $15 ($3 for extra pots, $2 for cardstock, $4 for plastic toads, $2 for moss, $4 for backup pumpkins)
What went wrong: I am not a plant person, despite my periodic delusions otherwise.
Kid reaction: They loved the creative labeling and spent dinner quizzing each other on the “real” herb names. Educational AND decorative!
Would I do it again? If I have a free weekend and want a project, yes. But this is definitely not a last-minute option.
Attempt #8: “Harvest Abundance” (The Safety Net)
By this point, I was exhausted from all the creative experimenting and just wanted something that would look nice without requiring a PhD in decorative problem-solving.
So I filled my biggest woven basket with gourds, small pumpkins, corn stalks from my neighbor’s yard (she was happy to share), pinecones from our last park visit, colorful fall leaves, and finished it with some orange and burgundy ribbon.
That’s it. No special effects, no interactive elements, no pieces that could shed or leak or require daily maintenance.
It looked beautiful. It smelled like fall. It survived two weeks without me touching it once. When people complimented it, I could accept the compliment without mentally calculating all the things that might go wrong.
What it cost me: $12 ($7 for pumpkins and gourds, $5 for ribbon)
What went wrong: Absolutely nothing, which was almost suspicious at this point.
Kid reaction: They liked rearranging the small pumpkins and making little scenes with them. Low-maintenance entertainment that didn’t involve sugar or scary elements.
Would I do it again? This is now my backup plan for every fall table until the end of time.
What I Actually Learned (Besides How to Remove Fake Cobwebs from Hair)
Test everything at kid height. I made so many centerpieces that looked great from my perspective but were either terrifying or irresistible to small humans. Now I always get down to their eye level to see what I’m actually creating.
Simple beats complicated every single time. My most elaborate centerpieces got initial “wow” reactions, but my simple ones got genuine compliments from people actually trying to eat dinner.
Scent is a real factor. That time I used cinnamon-scented pinecones and they competed with dinner? Not good. Now I’m very careful about adding any smells to the table area.
Lighting changes everything, but don’t get carried away. Candlelight makes everything look better, but dry ice fog machines are maybe too much for Tuesday night pot roast.
Kids will interact with everything. If it’s on the table, they will touch it, rearrange it, ask about it, and possibly try to eat it. Plan accordingly.
Maintenance requirements matter. The most beautiful centerpiece in the world isn’t worth it if it requires daily attention or starts rotting after a week.
The Real Shopping Strategy (AKA Where I Actually Get This Stuff)
My house first. I own way more potential centerpiece material than I thought. Baskets, candles, vases, interesting bowls, even serving trays can work.
Grocery store for basics. Pumpkins, gourds, mums, basic candles. I’m there anyway buying milk and forgetting what else was on my list.
Dollar Tree for Halloween touches. Their decorations have gotten surprisingly decent, and at $1.25 each, I can experiment without guilt. Just avoid anything that sheds.
My yard for natural elements. Free pinecones, interesting branches, colorful leaves. Sometimes the best stuff is literally outside my back door.
Target for when I want to feel fancy. Their seasonal section usually has one or two things that make everything else look more expensive.
What I don’t buy anymore:
- Anything that requires assembly during dinner prep time
- Decorations that only work for one specific holiday
- Items with small parts that can detach and migrate into food
- Anything that requires daily maintenance during the busy October schedule
The November 1st Strategy That Saves My Sanity
Here’s my favorite discovery: most Halloween centerpieces can transition to Thanksgiving with minimal changes.
Remove the obviously Halloween elements (plastic spiders, black candles, “Boo” signs), add some thankful touches (handwritten gratitude notes, gold ribbon, wheat stalks), and suddenly you have Thanksgiving décor.
The harvest abundance centerpiece? Doesn’t need to change at all. The black candle arrangement? Swap in burgundy or gold candles. The mason jar collection? Replace spooky labels with thankful quotes.
This year I’m planning every centerpiece with November 1st in mind. Two holidays, one basic investment, maximum return on my decorating effort.
When Your Family Has… Opinions
Actual quotes from my dining table experiments:
“Is that supposed to move like that?” —my dad, about the humidifier fog
“Oh, how… atmospheric.” —my mother-in-law, about literally everything
“Why did you put bugs on our dinner table?” —my 6-year-old, for three weeks straight
“There’s a small black feather in my mashed potatoes.” —my husband, very diplomatically
“Can we eat the decorations?” —my 5-year-old, about every centerpiece ever
My current approach: I ask myself, “Would I want to eat a nice meal while looking at this?” If the answer isn’t an immediate “yes,” I scale back.
The Truth About Pinterest vs. My Dining Room
I spent way too many hours scrolling through Pinterest boards with names like “Elegant Halloween Tablescapes” and “Spooky Chic Dinner Party.”
You know those photos—perfectly lit, styled with props you don’t own, featuring words like “tablescape” used unironically. Everything looks like it was arranged by someone who has never actually tried to pass a serving bowl around actual humans.
Here’s what those posts don’t show you:
- How many attempts it took to get that one perfect photo
- Whether anyone actually ate at that table
- The real budget (spoiler: it’s not $15)
- What happened after the photo was taken
- How it looked after three kids touched everything
My goal now isn’t to create the most Instagram-worthy centerpiece. It’s to make our family dinner feel special and festive without making anyone uncomfortable or preventing normal conversation.
And honestly? Some of my favorite Halloween dinner memories involve centerpieces that went slightly wrong. The year the candles dripped black wax everywhere and we had to scrape it off our plates. The time my toddler systematically rearranged all the mini pumpkins during dinner. The evening when everyone ended up laughing about the plastic spider that kept mysteriously moving around the table.
Those imperfect moments made the dinner more memorable, not less.
If You’re Starting From Scratch (And Want to Avoid My Mistakes)
Start with black candles and pumpkins. Seriously. I tested eight different approaches, and this one works every single time. It’s foolproof, costs under $10, and looks intentional instead of like you grabbed random orange objects and called it Halloween.
Don’t try to create a masterpiece on your first attempt. I spent three hours on that dry ice disaster and nearly hospitalized my in-laws with chemical fog. Sometimes simple is actually better.
Remember that people need to be able to eat around your centerpiece. If you can’t imagine enjoying meatloaf while looking at it, it’s probably too much.
And if you have kids, either make it completely kid-friendly or have a strategy for protecting it from small hands. There is no middle ground in this area. Children will find and manipulate every interactive element you include.
What’s your Halloween centerpiece style? Are you team “elegant autumn with a hint of spooky” or team “bring on the plastic bats”? I’d love to see how yours turn out—tag me @stylehomeforless on Instagram, especially if they go completely different than planned. Those are always the best stories!
P.S. I found another tiny black feather in my spice cabinet last week. From October. It’s like those ravens are still haunting my kitchen.
<More relative post>
Frequently Asked Questions
How do I make a Halloween centerpiece for under $15?
Start with a Dollar Tree run for basics: black candles or taper holders, plastic spiders or skulls, and some faux leaves or crows. Add a few items from your pantry — mason jars filled with colored water or dark beans look surprisingly spooky. The key is layering height: use a small box wrapped in black fabric or a stack of books under your main piece to create levels. You can absolutely pull together a table-worthy centerpiece for $10–$15 if you shop at Dollar Tree or use what you already have.
What makes a good Halloween centerpiece that works for dining?
The best dining centerpieces are low (so people can see each other across the table), not too wide (leave room for serving dishes), and don’t have scents that compete with food. Avoid anything with a strong fragrance — scented candles or fresh flowers — and skip anything that takes up more than about 18 inches in diameter at the table’s center. Focus on visual drama through color contrast: black, orange, and white work because they’re high-contrast even in dim lighting. Check out my dollar store DIY guide for printable labels and tags that add a personal touch.
Can I reuse Halloween centerpiece elements for Thanksgiving?
Absolutely — and this is one of my favorite money-saving moves. Faux pumpkins, gourds, dried orange slices, and neutral candle holders transition easily from Halloween to Thanksgiving. Just swap the spooky elements (skulls, spiders, black ravens) for warmer, harvest-themed fillers. My trick is to buy a base “vessel” — a wooden tray, a galvanized tin, or a simple white pumpkin — that works for both holidays with just a quick swap of accents. For more ideas on making decor work across seasons, see my post on seasonal home refresh tips.
Leave a Reply