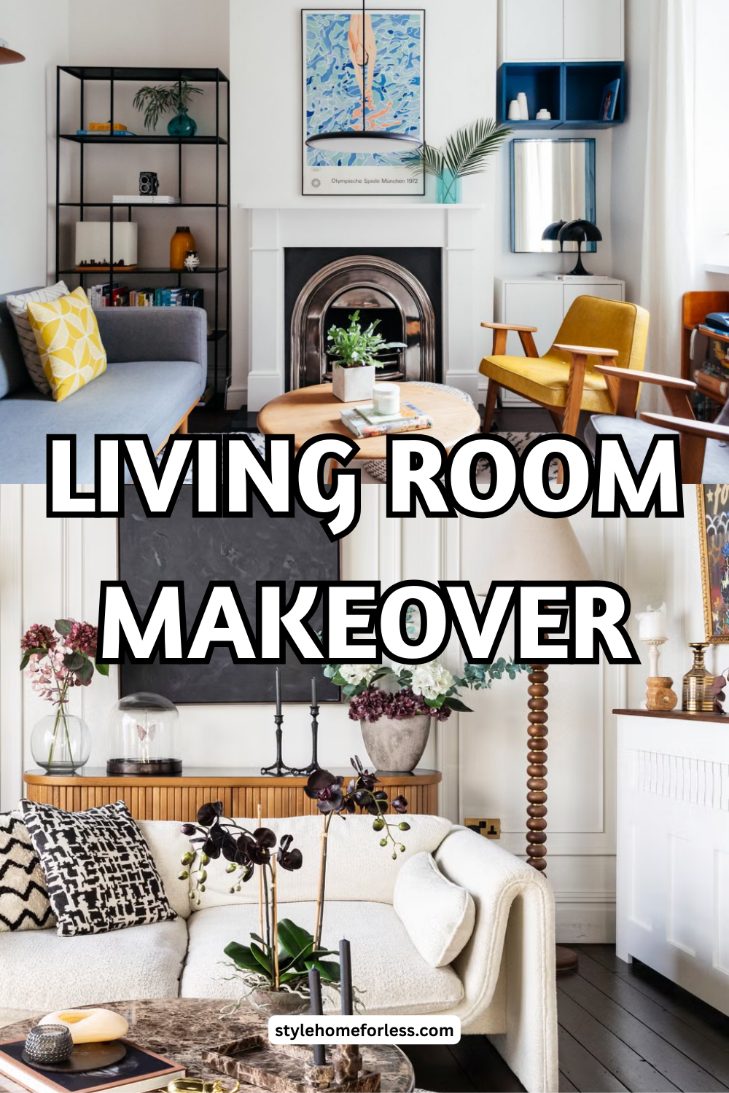
When your space is still screaming “summer” but your soul is already craving sweater weather
Okay, so this is embarrassing, but Tuesday night I had a full breakdown over throw pillows.
Not like, crying breakdown. More like standing in my living room at 7:23 PM, staring at my bright yellow summer pillows, and having this weird existential moment about how my space was making me feel completely disconnected from… well, everything.
You know that feeling when the seasons start shifting and suddenly your home feels all wrong? Like you’re wearing shorts in a snowstorm or something?
That was me. Scrolling Instagram fall home tours while sitting surrounded by what can only be described as “aggressive beach vibes.” My throw blanket was practically neon. My curtains were doing this whole “endless summer” thing. And I’m over here craving cinnamon candles and chunky knit everything.
But here’s where it gets really embarrassing: I opened my banking app to see how much I could spend on fall decorating.
Available balance after a summer of “just this one cute thing” purchases: $73.82
Seventy-three dollars and eighty-two cents. To transform my entire living room from tropical vacation rental to cozy autumn retreat.
I may have laughed out loud. Like, the kind of laugh that’s not actually funny but what else are you gonna do?
Then I remembered my neighbor Rachel, who somehow makes her apartment look like a Williams Sonoma catalog on what I know is a teacher’s salary. “I just move stuff around and change the lighting,” she always says when I ask her secret.
Challenge accepted, Rachel.
The “I Have No Money But Need Cozy Vibes” Reality Check
Can we talk about the shame spiral of wanting a beautiful home when you’re broke?
Because I was definitely spiraling. Looking at all these gorgeous fall living rooms online, mentally adding up what everything must have cost, and feeling like I was failing at basic adulting because I couldn’t afford a $45 throw pillow.
(Forty-five dollars! For one pillow! That’s like… three dinners!)
But then I had this moment of clarity, probably brought on by my third cup of coffee and the realization that I was being ridiculous.
What if the problem wasn’t my budget? What if it was my approach?
Here’s what I figured out after spending way too much time researching the psychology of “cozy”:
Your brain doesn’t actually care how much you spent. It just wants specific sensory cues that signal comfort and warmth. Most of these cues cost almost nothing to create.
The weird science behind cozy spaces:
- Warm lighting (not expensive lighting, just warm)
- Varied textures you can touch
- Colors that remind you of autumn/comfort
- Scents that trigger cozy memories
- Furniture arranged for conversation instead of TV watching
None of these require a trust fund. They just require being intentional instead of random.
My $60 Breakdown (AKA Every Dollar Accounted For)
After testing about seventeen different approaches (yes, I made a spreadsheet because I’m that person now), here’s what actually works:
Textiles & Comfort: $35
- Because your couch is like 60% of your visual space
- Throw pillow covers and blankets create instant transformation
- Layering existing stuff with new stuff stretches the budget
Lighting & Ambiance: $15
- String lights are magical and cost almost nothing
- Candles make everything better (this is scientific fact)
- Warm bulbs instead of those soul-crushing cool white ones
Natural Elements & Small Touches: $10
- Free stuff from outside mixed with tiny store purchases
- Small decorative objects that tie everything together
- One or two pieces that make the whole room feel intentional
Total: $60 (leaving me $13.82 for the coffee that would fuel this project)
The Weekend That Changed My Living Room (And Maybe My Life)
Friday Night: The Brutal Assessment
I started by taking photos of my living room from every angle. This was… humbling.
My space looked like someone had decorated it by closing their eyes and pointing at random stuff in Target. Nothing went together. There was no color story. It was just… beige furniture with random bright accessories that I’d bought because they were on sale.
The harsh truth: I’d been decorating with my wallet instead of my brain.
The game plan: Work with what I had, but make it make sense.
Saturday Morning: Strategic Shopping (AKA The Great $60 Adventure)
Stop #1: Target Clearance Section
Y’all. The clearance section at Target is either the best place on earth or a dangerous trap that will destroy your budget and your marriage. There’s no in-between.
I went in with my $60 budget and the discipline of a monk. (This lasted approximately seven minutes.)
What I almost bought:
- A gorgeous turquoise vase ($15)
- Geometric wall art that had nothing to do with fall ($20)
- Scented candles in every single fall fragrance they had ($40 worth)
What I actually bought:
- Two throw pillow covers in rust and cream: $12 total (originally $8 each, marked down to $6)
- Battery-operated string lights: $8
- Three fall-scented candles: $9
- One chunky cream throw blanket: $14 (this was my splurge and I don’t regret it)
Running total: $43
Stop #2: Dollar Tree (The Underrated MVP)
I used to be a Dollar Tree snob. Like, “surely nothing good can come from a store where everything costs a dollar.”
I was wrong. So wrong.
My haul:
- Small wooden bowl: $1.25
- Glass votive holders: $5 (bought 4 because I have no self-control)
- Cinnamon sticks for DIY scent stuff: $1.25
Running total: $50.50
Stop #3: My Own Apartment (The Free Goldmine)
This was the revelation that changed everything.
I spent an hour going through every room, every closet, every random storage bin, looking for stuff I could repurpose for fall decorating.
What I found:
- A rust-colored throw blanket I’d forgotten I owned (it was hiding under my bed)
- Wooden cutting boards that looked way better as décor than in my kitchen
- Books with gorgeous fall-colored spines that I could rearrange
- A ceramic vase in the perfect warm brown (living in my bathroom for no reason)
- Three brass candlestick holders (Christmas decorations, but they looked amazing with fall candles)
Cost: $0 Value to my living room transformation: Priceless
Saturday Afternoon: The Actual Magic Happens
Hour 1: Lighting Everything Up
First thing I did was turn off all the overhead lights and figure out how to create “mood lighting” without looking like I was trying to seduce someone.
The string light situation: I thought I’d just drape them around the window, but that looked like I was decorating for a college dorm party. After about twenty minutes of trial and error, I wove them through the branches of my fiddle leaf fig. Suddenly my plant looked like art.
The candle strategy: Instead of scattering candles randomly around the room, I grouped them on my coffee table in different heights. Used my new Dollar Tree votive holders plus the brass candlesticks I’d found.
The result: My living room went from “dentist office lighting” to “cozy café” in about thirty minutes.
Hour 2: The Textile Transformation
Here’s where I made my biggest discovery: you don’t have to throw out your summer stuff. You just have to be smarter about layering.
What I did:
- Flipped my existing throw pillows inside out (the “wrong” side was this gorgeous muted gold)
- Added the new rust and cream pillow covers
- Layered three different throws on my couch instead of just one
- Moved my summer blanket to the bottom of the pile as a base layer
The psychology: Having multiple textures makes people want to touch stuff, which makes them want to sit down and get comfortable.
Hour 3: The Natural Element Hunt
I spent forty-five minutes walking around my neighborhood collecting free decorating supplies. (Yes, I’m that person now. Yes, I got some weird looks.)
What I gathered:
- Interesting twigs that looked intentionally architectural
- Perfect acorns (I may have stood under an oak tree for ten minutes choosing the best ones)
- A few leaves that weren’t brown yet (pressed them between book pages)
- Small smooth rocks from someone’s decorative landscaping (I asked permission, I’m not a thief)
How I used them:
- Filled my new wooden bowl with acorns and small pinecones
- Put the twigs in that vase I’d found in my bathroom
- Used the pressed leaves in one of my existing picture frames
- Made a small arrangement on my side table with the rocks and a candle
Hour 4: The Final Styling
This is where I almost ruined everything with perfectionism.
I spent twenty-seven minutes trying to arrange three candles “perfectly” on my coffee table. Twenty-seven minutes! For three candles!
Finally, my friend texted asking what I was up to, and I told her I was having a nervous breakdown over candle placement. She replied with laughing emojis and “just put them down and walk away.”
Best advice ever.
The final touches:
- Rearranged my bookshelf to feature books with fall-colored spines
- Moved my couch pillows around until they looked “casually perfect”
- Lit all the candles and stepped back
The moment of truth: I turned off the overhead lights, lit the candles, and sat down on my couch.
Holy crap. It worked.
The Mistakes That Almost Destroyed Everything
Mistake #1: Shopping Without a Plan
I almost bought that turquoise vase because it was pretty and on sale. Never mind that turquoise doesn’t say “fall” and I had no idea where I’d put it.
The save: I took a photo of it and walked away. Still think it’s gorgeous, but it would’ve been a $15 mistake.
Mistake #2: Trying to Copy Instagram Exactly
There was this one fall living room photo I kept going back to. Everything was perfectly arranged, perfectly coordinated, perfectly lit. I tried to recreate it exactly.
The result: My room looked like a sad imitation instead of my actual space.
The fix: I stopped trying to copy someone else’s style and focused on making my space feel cozy to me.
Mistake #3: Overcomplicating the Natural Elements
I had this grand vision of creating these elaborate nature arrangements, like some kind of Martha Stewart autumn masterpiece.
Reality: I’m not Martha Stewart. My elaborate arrangements looked like a craft project exploded.
What actually worked: Simple groupings. Three pinecones in a bowl. Five acorns scattered on a tray. Easy, natural, not trying too hard.
Mistake #4: Forgetting About Real Life
In my excitement to make everything look magazine-perfect, I almost arranged my furniture in a way that looked great but was completely impractical for actually watching TV or having conversations.
The reality check: Your living room has to work for your actual life, not just for photos.
What Actually Creates “Expensive” Vibes on a Budget
After six weeks of living with these changes, here’s what I’ve learned about making budget decorating look intentional:
Color Temperature is Everything
Cool colors = summer energy Warm colors = fall coziness
I didn’t buy expensive new furniture. I just made sure everything in my room was in the warm color family: rust, cream, gold, natural wood tones.
The magic: When everything shares a color temperature, it looks like you planned it instead of just buying random stuff on sale.
Layer Textures, Not Prices
Smooth + Rough + Soft = Visual Interest
My coffee table has:
- Smooth wooden bowl (thrift store, $1)
- Rough pinecones (free from outside)
- Soft fabric coaster (made from old t-shirt scraps)
Total cost: $1 Visual impact: Looks like I hired a decorator
Lighting Layering Makes Everything Look Expensive
Single overhead light = cheap apartment Multiple warm light sources = cozy retreat
My living room now has:
- String lights for ambient glow
- Candles for warmth and scent
- One table lamp with warm bulb
- Natural light during the day
The psychology: Your brain associates multiple light sources with expensive restaurants and hotels.
The Power of “Imperfect” Arrangements
Perfect symmetry = looks staged Slightly asymmetrical = looks natural and expensive
I stopped trying to center everything and started creating visual triangles with my decorative objects. Way more interesting to look at.
The Two-Week Reality Check
Week 1: The Honeymoon Phase
Everything felt amazing. I kept finding excuses to hang out in my living room. Made myself tea just so I had a reason to sit on my cozy couch. Lit candles every single evening.
Week 2: The Real Test
This is when I found out if the changes actually worked for my real life or if they were just pretty to look at.
What held up:
- The lighting made me want to spend time there instead of hiding in my bedroom
- The layered throws meant I was always comfortable, no matter the temperature
- The candles became part of my evening routine in the best way
What needed adjusting:
- Had to move one of the candles because I kept almost knocking it over reaching for my water glass
- The throw pillows looked great but weren’t actually comfortable to lean against (fixed by fluffing them differently)
The Psychological Changes I Didn’t Expect
I Started Entertaining Again
Before this makeover, I never invited people over because I was embarrassed about how random and uncomfortable my living room looked.
After? I’ve had friends over three times in the past month. The cozy factor makes people want to stay and actually have conversations instead of just watching TV.
My Evening Routine Changed
Before: Come home, eat dinner while scrolling phone, go to bedroom to watch Netflix After: Come home, light candles, make tea, actually sit in my living room and read or journal
The weird part: This wasn’t conscious. The space just started encouraging different behaviors.
I Sleep Better
This sounds crazy, but I think having a dedicated “wind down” space that isn’t my bedroom has improved my sleep. I do my evening routine in the living room now, so when I go to bed, my brain knows it’s actually time to sleep.
Common Problems and Real Solutions
“My living room is tiny and these ideas won’t work”
My response: My living room is 12×10 feet. Not exactly spacious.
What works in small spaces:
- Focus on lighting over furniture changes
- Use mirrors to reflect your new cozy lighting
- Vertical elements (tall candles, hanging plants) draw the eye up
“I have roommates/family who won’t go along with seasonal decorating”
The compromise approach:
- Focus on changes that improve comfort for everyone (better lighting, cozy textures)
- Keep seasonal elements small and contained to specific areas
- Choose universally appealing scents (vanilla, cinnamon) over polarizing ones
“I rent and can’t make any permanent changes”
Every single change I made is completely reversible:
- No paint, no holes in walls, no permanent modifications
- Everything can be packed up and moved to your next place
- Command strips for string lights, battery-operated everything
“I don’t have time for a weekend project”
The 30-minute version:
- Change your lighting (string lights + candles): 10 minutes
- Swap out pillow covers: 5 minutes
- Light a fall-scented candle: 2 minutes
- Rearrange existing furniture slightly closer together: 10 minutes
- Gather a few natural elements from outside: 15 minutes
Total time: 42 minutes Impact: Still dramatically different
What Happened Next (The 6-Week Update)
The sustainability test: Six weeks later, am I still happy with these changes?
What’s still working:
- I light candles almost every evening (this has become my favorite ritual)
- The cozy seating arrangement gets used daily
- Friends still comment on how welcoming the space feels
- The warm lighting makes everything look better, including me
What I’ve tweaked:
- Added one more throw pillow because I’m a throw pillow addict now
- Rotated some of the natural elements as they dried out
- Moved the string lights to a slightly different position for better light distribution
The surprise benefit: This project taught me to see my entire apartment differently. I’ve applied the same principles to my bedroom and kitchen, with equally good results.
Your Cozy Living Room Action Plan
This Weekend: Start with Lighting ($15-20)
The immediate impact changes:
- Add string lights anywhere they’ll look intentional
- Group candles instead of scattering them randomly
- Switch to warm bulbs in any lamps you already have
Why start here: Lighting changes are dramatic, relatively cheap, and you’ll see results immediately.
Next Weekend: Add Cozy Textures ($20-30)
The comfort layer:
- One or two new throw pillow covers in fall colors
- Layer existing blankets or add one cozy throw
- Rearrange seating to encourage conversation
Following Weekend: Natural Elements & Styling ($10-15)
The finishing touches:
- Collect free decorating materials from outside
- Restyle surfaces with seasonal arrangements
- Make small adjustments based on how you’re actually using the space
Success measurement: Does walking into your living room make you want to stay there?
The Real Talk About Budget Decorating
Here’s what nobody tells you about decorating on a budget: it’s not about having less money, it’s about being more creative.
When you can’t just buy your way to a beautiful space, you have to actually think about what makes spaces beautiful. You learn about color, texture, lighting, proportion. You develop an eye for what works and what doesn’t.
The skills you develop:
- Understanding what creates visual harmony
- Seeing potential in things others overlook
- Making decisions based on how spaces feel, not just how they look
- Building confidence in your own taste instead of copying others
The confidence factor: Every time someone compliments your space and you get to say “thanks, I did it myself,” you build a little more trust in your own creative abilities.
Looking Ahead: Winter Transition Planning
The beauty of this approach: These same elements work for winter decorating with minor adjustments.
November additions: Heavier blankets, deeper colors, more candles for shorter days December holidays: Layer in festive elements without starting over January reset: Pull back to cozy basics while maintaining the warm foundation
The long-term value: This $60 investment creates a system for year-round seasonal decorating, not just a one-time fall makeover.
What This Actually Taught Me
The biggest lesson: Your home doesn’t need to be expensive to be beautiful. It needs to be intentional.
The confidence shift: I went from feeling intimidated by home decorating to actually enjoying the creative process.
The practical impact: I spend more time at home now because I actually enjoy being here. That’s probably saved me money on entertainment and going out.
The social benefits: Having a space I’m proud of means I invite people over more often. My relationships have benefited from having a comfortable place to host conversations.
Your living room should support the life you want to live. For the cost of a nice dinner out, you can create a space that makes every evening feel a little more special.
Sometimes the best home improvements aren’t about the money you spend—they’re about the intention you bring to creating a space that truly feels like yours.
Frequently Asked Questions
How can I make my living room feel cozy for fall without spending a lot?
The biggest impact changes are free or almost free: swap in warmer light bulbs (2700K instead of 5000K daylight bulbs), layer blankets and pillows you already own in autumn tones, and group candles together on a tray for an instant mood change. After that, a few strategic dollar store finds—a simple wreath, a small pumpkin or two, a cinnamon-scented candle—can take a space from “summer holdout” to genuinely cozy without touching your credit card.
What’s the most affordable way to update throw pillows for fall?
Pillow covers are your best friend here. Instead of buying new pillows, a set of two fall-toned covers runs $10–$20 on Amazon or at TJ Maxx. You keep your existing pillow inserts, swap the covers in September, and swap them back in spring. Over time you build a small seasonal cover library without ever paying full pillow price again. Deep burgundy, burnt orange, and warm cream are versatile enough to work in almost any living room.
Can I do a fall living room refresh if I rent and can’t paint or make permanent changes?
Absolutely — and honestly, renters sometimes end up with more creative setups because they lean into non-permanent solutions. Focus on textiles (rugs, blankets, pillow covers), lighting (floor lamps, string lights, candles), and tabletop vignettes (trays with grouped seasonal objects). None of these require a landlord’s permission, and all of them have a huge visual impact. A warm-toned area rug layered over existing flooring is probably the single biggest renter-friendly transformation you can make for under $50.
Ready to create your own $60 fall living room transformation? Share your biggest challenge in the comments—is it budget, time, or just not knowing where to start? I love helping people figure out what’ll work best for their specific space and situation!
This week’s new articles:
- Cozy Bathroom Updates: 12 Fall Touches Under $40 (Monday)
- 20 Fall Décor Ideas from Target’s Dollar Spot (Wednesday)
More budget fall decorating:
Leave a Reply