
Because $60 wreaths from the craft store are highway robbery, and you know it
Last weekend, I was walking through Hobby Lobby (mistake #1) when I spotted this gorgeous fall wreath. All rustic and perfectly imperfect, with layers of autumn leaves and little touches that made it look like something from a farmhouse magazine.
I reached for the price tag like an optimist.
$67.99.
For a WREATH. Made of fake leaves and some twiggy things that probably cost $3 to manufacture.
I may have said something inappropriate out loud because this mom with her kids gave me a look and steered her cart in the opposite direction.
But seriously—when did door decorations start costing more than my monthly streaming subscriptions? When did we all just accept that seasonal décor requires taking out a small loan?
That’s when my stubbornness kicked in. The same stubbornness that once made me spend four hours trying to fix my garbage disposal instead of calling a plumber. (Spoiler: I should have called the plumber.)
“I can make that,” I muttered, taking a photo of the $67 masterpiece.
Famous last words, right? But here’s the plot twist: I actually could. And so can you.
The Dollar Store Wreath Revolution

Two hours and $23 later, I was standing in my living room with a fall wreath that looked… honestly? Better than the one at Hobby Lobby.
The breakdown:
- Grapevine wreath base: $3 (Dollar Tree)
- Assorted fake fall leaves: $6 (two packages)
- Mini pumpkins and gourds: $4 (four pieces)
- Burlap ribbon: $2 (Dollar Tree craft section)
- Floral wire: $1 (already had this, but pricing it in)
- Hot glue sticks: $2 (needed refills anyway)
- Autumn berries and accents: $5 (clearance package)
Total damage: $23
But here’s what really got me excited: this wasn’t a fluke. I’ve now made eight different fall wreaths using only Dollar Tree supplies, and every single one looks like it could sell for $40-60 at a boutique shop.
The secret sauce? Understanding which dollar store items have serious decorating potential versus which ones look… well, like dollar store items.
Why DIY Wreaths Actually Make Sense (Beyond Saving Money)
Look, I’ll be honest. My first attempt was not Pinterest-worthy. It looked like a craft project gone wrong, and I may have questioned all my life choices while staring at the lopsided mess.
But here’s what changed my mind: wreaths are basically just organized chaos. Once you understand the formula, they’re nearly impossible to mess up.
The psychology part: There’s something deeply satisfying about creating something beautiful with your hands. Plus, every time someone compliments your door, you get to casually mention “Oh, I made that.”
The practical part: Seasonal wreaths at retail stores cost $30-80 EACH. If you switch them out for different seasons (which, let’s be real, you totally should), you’re looking at $200+ per year just for door decorations.
The creativity bonus: Making your own means custom colors, personalized touches, and the flexibility to modify as your taste evolves.
The 8 Fall Wreaths That Actually Work (Tested and Perfected)
1. The Classic Autumn Abundance ($18)

Supply List:
- Grapevine wreath (12″): $3
- Mixed fall leaf package: $3
- Mini pumpkins (pack of 3): $3
- Pinecones (natural or artificial): $2
- Burlap bow material: $2
- Small berries or accent pieces: $3
- Hot glue and floral wire: $2
Time Investment: 45-60 minutes
Skill Level: Beginner (seriously, if I can do it, anyone can)
This is your foolproof starter wreath. The abundance approach means if something looks slightly off, you just add more stuff until it looks intentional.
Step-by-Step Process:
Step 1: Create Your Foundation (10 minutes) Start with the grapevine base and create “zones” around the wreath. I mentally divide it into thirds and plan to put a major element (like a pumpkin) in each zone.
Step 2: Layer Your Leaves (15 minutes)
This is where most people go wrong. Don’t just stick leaves randomly everywhere. Group them in clusters of 3-5, varying the sizes and colors within each cluster. Attach with hot glue at the stem point.
Pro tip: Point some leaves in different directions for natural movement. Nature isn’t symmetrical, and your wreath shouldn’t be either.
Step 3: Add Your Statement Pieces (10 minutes) Position your mini pumpkins first—they’re the visual anchors. Use floral wire to secure them by wrapping around the stems and through the grapevine base. This holds way better than glue alone.
Step 4: Fill and Layer (15 minutes) Add pinecones, berries, and smaller accent pieces to fill gaps. The key is building layers—some elements should sit on top of others, creating depth.
Step 5: Finish with Ribbon (5 minutes) Make a simple burlap bow and wire it to the bottom of the wreath. Keep it loose and slightly messy for that rustic feel.
What makes this one work: The mix of textures (smooth pumpkins, rough pinecones, soft leaves) creates visual interest even with simple materials.
2. The Minimalist Modern ($14)

Supply List:
- Metal hoop wreath form: $3 (or wire form)
- Single-color leaf sprays: $4 (choose one color family)
- Thin copper wire: $2
- Optional: spray paint for the hoop: $3
- Simple ribbon: $2
Time Investment: 30-40 minutes
Skill Level: Beginner
Perfect for those who love clean lines but want seasonal touches.
The Technique: Select leaves in just one color family—all deep reds, all golden yellows, or all burgundy. Attach them to one section of the hoop (about 1/3 of the circle) using thin wire instead of hot glue for a cleaner look.
Why it works: The restraint makes it feel sophisticated rather than crafty. The single color story reads as intentional design choice.
Styling tip: This looks amazing against modern front doors or paired with minimalist porch décor.
3. The Cozy Farmhouse ($22)
Supply List:
- Large grapevine wreath (16″): $4
- Burlap ribbon (wide): $3
- Cotton stems or branches: $4
- Mini Indian corn: $3
- Small mason jar: $1
- Battery-operated string lights: $3
- Wheat or grain stems: $4
Time Investment: 60-75 minutes
Skill Level: Intermediate
This one takes a bit more time but creates serious wow factor.
The Special Touch: Wire a small mason jar to the bottom of the wreath and fill it with battery-operated string lights. The warm glow makes the whole wreath feel magical in the evening.
Construction Strategy:
- Create a large burlap bow as your focal point
- Attach cotton stems in asymmetrical clusters
- Add wheat stems pointing in different directions for movement
- Secure the mason jar with wire, hiding connection points behind the bow
- Distribute Indian corn around the wreath for color pops
What makes it special: The lighting element sets this apart from standard wreaths. It becomes functional art that lights up your entryway.
4. The Rustic Natural ($16)
Supply List:
- Twig wreath base: $3
- Real or artificial acorns: $2
- Preserved leaves (pressed): $0 (gathered from yard)
- Natural raffia: $2
- Small branches: $0 (yard clippings)
- Spray adhesive: $3
- Clear protective spray: $3
Time Investment: 50-65 minutes
Skill Level: Intermediate
This approach mixes free natural elements with minimal store-bought supplies.
The Natural Gathering Process: Spend 30 minutes collecting materials from your yard or neighborhood (with permission). Look for:
- Interesting branch shapes
- Perfect leaves in various stages of color change
- Acorns, nuts, or seed pods
- Small pieces of bark with character
Construction Notes:
- Clean all natural materials and let dry completely before use
- Apply clear protective spray to preserve leaves and prevent cracking
- Use raffia instead of ribbon for an authentic rustic feel
Reality check: This wreath looks amazing but requires the most prep time due to gathering and preparing natural materials.
5. The Elegant Monochrome ($19)

Supply List:
- Wire wreath form: $2
- Burgundy leaf stems (multiple packages): $6
- Matching ribbon: $3
- Burgundy berries: $3
- Deep red mini pumpkins: $3
- Metallic spray paint: $2
Time Investment: 40-50 minutes
Skill Level: Beginner to Intermediate
The Concept: Use only different shades of one color to create sophisticated depth.
Color Strategy: Choose burgundy, deep red, or rich orange as your base. Find leaves, berries, pumpkins, and ribbon all within that color family. The monochromatic approach looks intentionally designed rather than randomly assembled.
The Metallic Touch: Lightly spray some elements with metallic paint before assembly. Don’t cover completely—just hit the edges for subtle shimmer that catches light.
Why this works: Monochromatic designs photograph beautifully and look expensive because they appear carefully curated.
6. The Texture Festival ($21)

Supply List:
- Foam wreath base: $2
- Burlap fabric scraps: $3
- Felt fall leaf shapes: $4
- Yarn pom-poms: $3
- Twine: $2
- Fabric glue: $2
- Wooden beads: $3
- Feathers: $2
Time Investment: 70-90 minutes
Skill Level: Intermediate to Advanced
The Approach: Layer different textures to create visual and tactile interest.
Texture Combinations:
- Rough burlap against smooth beads
- Soft yarn pom-poms with crisp felt leaves
- Natural twine wrapping with delicate feathers
- Matte foam base with shiny bead accents
Construction Method: Wrap sections of the foam base with burlap, securing with fabric glue. Add other elements in clusters, building up layers. The goal is creating a wreath that people want to touch.
Advanced tip: Vary the direction different textures face to create movement and prevent the wreath from looking flat.
7. The Harvest Celebration ($24)
Supply List:
- Large grapevine base (18″): $5
- Mini corn on the cob: $4
- Small artificial apples: $3
- Wheat bundle: $3
- Sunflower heads: $4
- Checkered ribbon: $3
- Raffia: $2
Time Investment: 55-70 minutes
Skill Level: Intermediate
The Theme: Celebrate the harvest season with functional-looking elements.
Design Philosophy: This wreath should look like you raided a farmer’s market. Everything should appear edible or agricultural, even if it’s artificial.
Assembly Strategy:
- Position sunflowers as your main focal points
- Cluster harvest elements (corn, apples) in groups of odd numbers
- Use wheat to create movement and fill gaps
- Finish with a big checkered bow for country charm
The reality: This is the largest and most dramatic of the wreaths. Perfect for big front doors or covered porches where it won’t be overwhelmed by the space.
8. The Simple Elegance ($12)
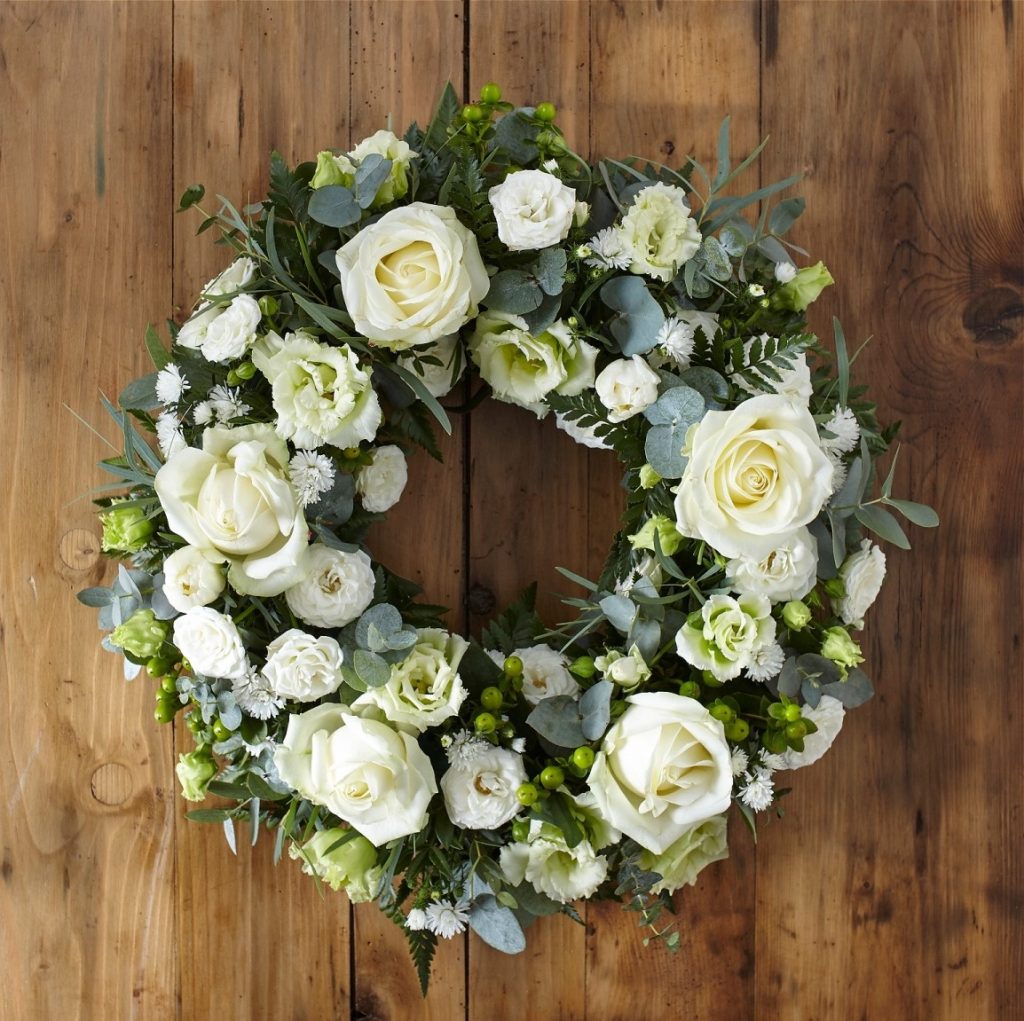
Supply List:
- Metal hoop (embroidery hoop works): $2
- Eucalyptus garland: $4
- Cream ribbon: $2
- Small white pumpkins: $4
Time Investment: 25-35 minutes
Skill Level: Beginner
The Minimalist Approach: Sometimes less really is more.
Why this works: The neutral color palette works with any door color or exterior style. It’s fall-appropriate without being overwhelming.
Construction: Wrap eucalyptus garland around 2/3 of the hoop, leaving the bottom third open. Attach small white pumpkins with wire. Add a simple cream bow.
The surprise factor: This is the quickest to make but often gets the most compliments because it looks professionally designed.
The Dollar Store Shopping Strategy That Actually Works
After making eight different wreaths, I’ve learned which Dollar Tree aisles are gold mines and which ones are time wasters.
Best Wreath Supply Sections:
Floral/Craft Aisle:
- Wreath bases (grapevine, wire, foam)
- Artificial leaf stems
- Ribbon and raffia
- Floral wire and picks
Seasonal Section:
- Mini pumpkins and gourds
- Pinecones and acorns
- Fall garland materials
- Themed picks and accents
Kitchen Section (unexpected goldmine):
- Small baskets for wreath attachments
- Wooden items that can be spray painted
- Mason jars for lighting elements
What to Skip:
- Anything that looks obviously plastic
- Items with garish, unnatural colors
- Decorative elements that are too small to make visual impact
- Pre-made wreaths (they’re usually cheaper to make yourself)
Shopping Timing:
- Mid-August: Fall items start appearing
- Early September: Best selection before picked over
- Late September: Some markdowns begin
- Early October: Major clearance starts
Pro tip: Shop multiple Dollar Trees if possible. Inventory varies significantly between locations.
Common Mistakes That Ruin Otherwise Good Wreaths
Mistake #1: Even Distribution
What it looks like: Everything perfectly spaced around the wreath like a clock Why it’s wrong: Nature isn’t symmetrical, and artificial symmetry looks… artificial The fix: Create visual weight on one side, balance with smaller elements on the other
Mistake #2: All Same-Height Elements
What it looks like: Everything sits at the same level, creating a flat appearance Why it’s wrong: No depth or visual interest The fix: Layer elements at different heights, some sitting on top of others
Mistake #3: Too Much Variety
What it looks like: Every different fall element crammed onto one wreath Why it’s wrong: Looks chaotic rather than thoughtfully designed The fix: Choose 3-5 element types maximum, use them in varying quantities
Mistake #4: Cheap Ribbon Choices
What it looks like: Shiny, obviously synthetic ribbon that screams “craft project” Why it’s wrong: Quality ribbon elevates the entire piece The fix: Invest in natural materials like burlap, raffia, or linen-look ribbon
Mistake #5: Ignoring Scale
What it looks like: Tiny elements lost on large wreaths, or oversized elements overwhelming small bases Why it’s wrong: Proportions feel off even if you can’t identify why The fix: Match element size to wreath size—bigger bases need bolder elements
Making It Look Professional (The Details That Matter)
Color Harmony Rules:
- Monochromatic: Different shades of the same color (safest option)
- Analogous: Colors next to each other on color wheel (warm fall palette)
- Triadic: Three colors evenly spaced on color wheel (more advanced)
Attachment Techniques That Last:
- Hot glue: For lightweight elements, quick attachment
- Floral wire: For heavier items, more secure hold
- Zip ties: Hidden behind other elements, incredibly strong
- Combination method: Wire for security, glue for finishing
Finishing Touches:
- Trim visible wire ends: Nothing says “homemade” like exposed wire
- Fluff and adjust: Step back, make small positioning adjustments
- Weather protection: Light coat of acrylic sealer for outdoor use
The Real Cost Comparison
My 8 wreaths cost $148 total to make Equivalent store-bought wreaths: $350-500 Time investment: About 8 hours total Cost per hour: $18.50 in materials
But here’s the real math: These wreaths will last 2-3 seasons with proper storage. Amortized over three years, that’s less than $50 per year for seasonal door décor.
Compare to: Buying one new wreath each season at $40-60 each = $120-180 per year
Plus the satisfaction factor: Every compliment feels better when you made it yourself.
Storage and Maintenance (Making Them Last)
Proper Storage:
- Clean dust before storing
- Store flat in large plastic bins
- Separate layers with tissue paper
- Climate-controlled areas preferred
Maintenance Between Seasons:
- Gentle dusting with soft brush
- Check wire connections, re-secure loose elements
- Touch up any faded areas with matching spray paint
Weather Protection:
- Clear acrylic sealer for outdoor use
- Covered porch preferred over direct weather exposure
- Bring indoors during severe weather
Your DIY Wreath Action Plan
This Weekend: Start with #8 (Simple Elegance)
- Lowest cost, quickest completion
- Hard to mess up, guaranteed success
- Builds confidence for more complex projects
Next Weekend: Try #1 (Classic Autumn Abundance)
- Uses techniques you’ll need for all other wreaths
- Most versatile design, works with any décor style
- Good practice for layering and proportion
Future Projects: Choose based on your style preferences
- Minimalist home → #2 (Minimalist Modern)
- Farmhouse style → #3 (Cozy Farmhouse)
- Natural/eco-friendly → #4 (Rustic Natural)
Advanced Challenge: Design your own combination
- Mix techniques from different tutorials
- Use your specific color preferences
- Adapt to your door size and style
The Bigger Picture: What This Really Teaches
Making these wreaths taught me something important about DIY decorating in general: the skills transfer to everything else.
Understanding color harmony, proportion, texture mixing, and layering techniques applies to:
- Mantel decorating
- Coffee table styling
- Gallery wall arrangements
- Seasonal table settings
The confidence builder: Successfully making something beautiful with dollar store supplies proves that good design comes from understanding principles, not expensive materials.
The creativity unlock: Once you know the “rules,” you can break them intentionally to create your own style.
What People Actually Say
The response has been overwhelming:
- Neighbors asking for the “source” of my wreath
- Friends requesting tutorials and supply lists
- Complete strangers stopping to compliment my door
- Three requests to make wreaths for other people
The most common reaction: “Wait, you MADE that?”
The second most common: “Can you teach me how?”
The confidence boost is real. There’s something powerful about creating beautiful things with your own hands that changes how you see your creative abilities.
The Truth About Time Investment
Let’s be realistic about the time commitment:
First wreath: Plan on 90 minutes including mistakes and learning curve Second wreath: About 60 minutes as you get more confident
Third and beyond: 45 minutes or less depending on complexity
The learning curve is worth it. Skills you develop making the first wreath apply to every subsequent project.
Time-saving strategies:
- Prep all materials before starting assembly
- Work in good lighting to avoid mistakes
- Have tools organized and easily accessible
- Take breaks if you get frustrated—fresh eyes see solutions better
Your Next Steps
Start this weekend: Choose one wreath tutorial and gather supplies Document your process: Take before, during, and after photos Share your success: These projects are meant to be celebrated Plan your seasonal rotation: Fall is just the beginning—these techniques work for winter, spring, and summer decorating too
Most importantly: Don’t aim for perfection on your first try. Aim for “better than store-bought for 1/3 the price.” You’ll hit that target easily.
The most expensive part of fall decorating isn’t the materials—it’s believing you need to buy rather than create. These eight wreaths prove that with basic supplies and a little creativity, your front door can look like a magazine cover without the magazine budget.
Your neighbors are going to want to know your secret. And now you have one worth sharing.
Frequently Asked Questions
What supplies do I need to make a dollar store fall wreath?
The basics you’ll need are a grapevine or foam wreath base ($1–$3 at Dollar Tree), a pack of faux fall leaves ($1–$2), and a hot glue gun with extra glue sticks. From there, you can customize with ribbon, mini pumpkins, acorns, or berries—all of which you can find in the dollar section. Total investment is usually under $10, and most of the supplies can be reused or repurposed for other seasonal projects.
How long does a DIY dollar store wreath last?
With proper storage, a well-made dollar store wreath can last 3–5 seasons. The key is keeping it out of direct sunlight (which fades the faux leaves), storing it in a wreath box or large paper bag during the off-season, and handling it gently when putting it up and taking it down. A quick touch-up with fresh ribbon or a few replacement leaves each year keeps it looking new.
Can I hang a DIY wreath on a door without damaging it?
Yes! The easiest renter-friendly option is an over-the-door wreath hanger—they cost about $5 and require zero nails or adhesive. If you prefer a cleaner look, Command strips designed for wreaths and lightweight frames work great for doors up to about 2 lbs. For heavier wreaths, a tension rod across the inside of the door frame with a ribbon loop is a solid no-damage solution that also looks intentional and styled.
Ready to create your own stunning fall wreath? Pick your favorite tutorial and share your results in the comments—I love seeing how these dollar store transformations turn out in different homes and styles!
This week’s new articles:
- Living Room Makeover: Adding Fall Coziness for $60 (Friday)
- Cozy Bathroom Updates: 12 Fall Touches Under $40 (Monday)
More budget fall decorating:
Leave a Reply