
Transform your home with budget-friendly crafts that deliver luxury style without the premium price tag
Last Tuesday, I walked into Dollar Tree looking for storage containers and walked out with a cart full of “trash” that would become my living room’s most complimented décor pieces. That’s the magic of dollar store DIY – seeing potential where others see plastic junk.
After decorating three homes on shoestring budgets, I’ve cracked the code on making cheap materials look expensive. The secret isn’t just in the technique (though that matters). It’s understanding which dollar store finds have the bones of high-end pieces.
Ready to fool your friends into thinking you hired an interior designer? These 15 projects prove that style beats budget every single time.
Why Dollar Store DIY Actually Works
Here’s what the home décor industry doesn’t want you to know: expensive pieces often start with the same basic shapes as dollar store items. The difference? Surface treatments, finishes, and styling details you can easily replicate.
Take that $85 “marble” tray from West Elm. Strip away the marketing, and it’s a plastic base with painted finish – exactly what we’re making for $5.
Plus, dollar stores carry surprisingly sturdy basics. I have Dollar Tree picture frames that outlasted $20 versions from Target. When you’re only risking a buck per item, you can experiment boldly without buyer’s remorse.
1. Faux Carrara Marble Serving Tray

Materials:
- Rectangular plastic tray ($1)
- White primer spray paint ($1)
- Gray paint pen ($1)
- Gold metallic marker ($1)
- Matte clear coat ($1)
Total: $5 (looks like $50)
This project taught me that marble veining is an art, not a science. Start with primer – it’s crucial for paint adhesion on plastic. Once dry, use a gray paint pen to draw organic, flowing lines. Study real Carrara marble photos first; the veining should look random but purposeful.
The gold touches are what sell the luxury look. Add tiny intersecting lines sparingly. Less is more here.
I made six of these for a dinner party. Guests spent the evening asking where I bought them. The secret? Confidence in your “marble” skills.
Pro tip: Practice veining patterns on paper first. Once you commit to the tray, there’s no going back.
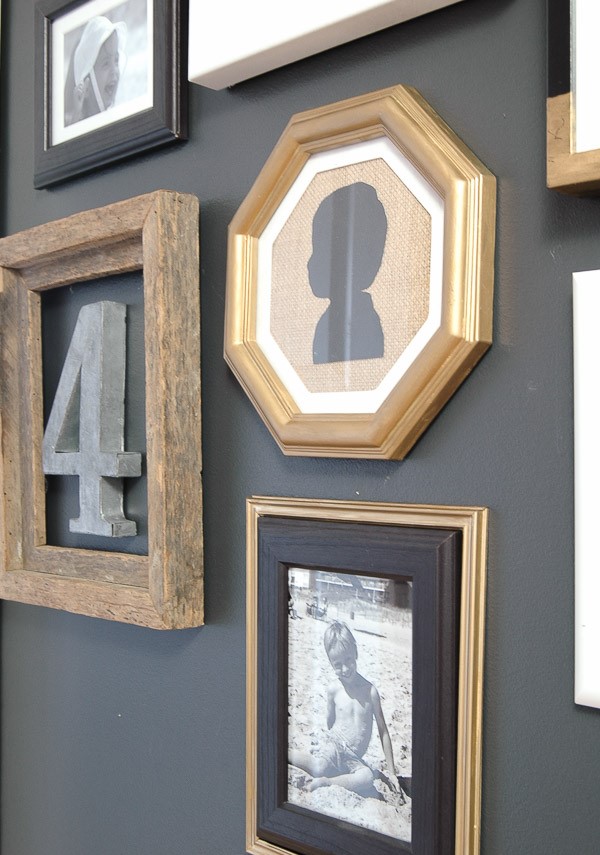
2. Gallery-Worthy Black Frames
Materials:
- 8-10 basic frames in various sizes ($8-10)
- Matte black spray paint ($1)
- Fine-grit sandpaper ($1)
Total: $10-12 (beats $80 gallery sets)
This might be the easiest transformation with the biggest impact. Dollar store frames scream “cheap” because of their shiny, uneven finish. The solution? Uniform matte black paint.
Remove glass and backing first (save these!). Light sanding helps paint stick better. Apply thin, even coats – rushing creates drips that ruin the professional look.
My living room gallery wall uses entirely Dollar Tree frames. Visitors assume they’re from CB2. The uniform color creates cohesion while varied sizes add visual interest.
Styling secret: Odd numbers look more natural. Use 3, 5, or 7 frames per grouping.
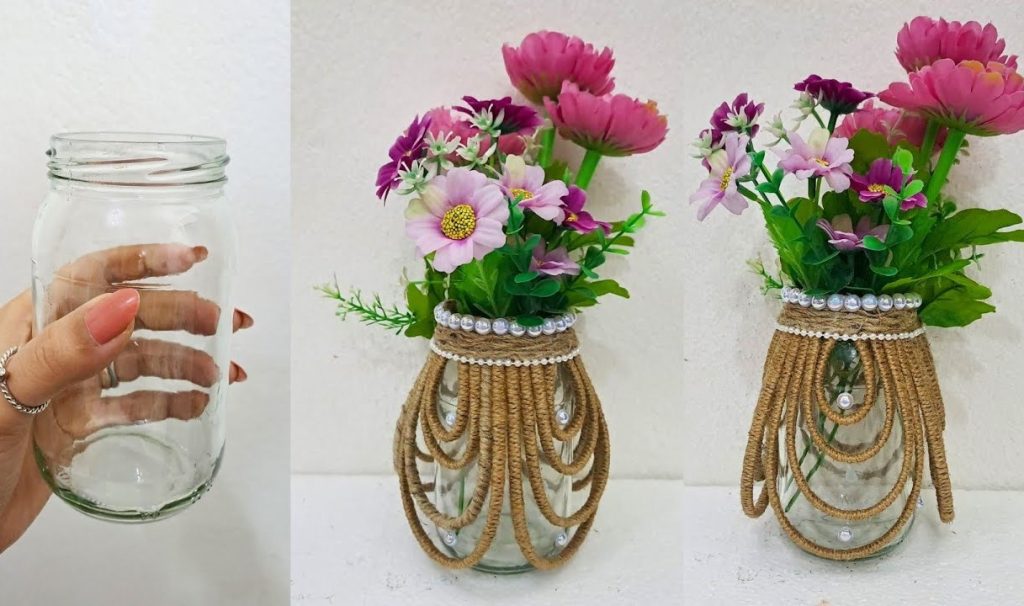
3. Spa-Style Rope Storage Jars
Materials:
- Glass hurricane holders (3 pieces – $3)
- Natural jute rope ($1)
- Hot glue gun and sticks ($2)
Total: $6 (comparable to $45 spa accessories)
These transformed my chaotic bathroom into an organized sanctuary. Wrap rope around glass holders, securing with hot glue every few rotations. Keep tension consistent for professional results.
Use them for cotton balls, bath salts, or rolled washcloths. The glass keeps contents visible while rope adds organic texture that screams “expensive spa.”
My guest bathroom features three sizes grouped together. It’s the most photographed corner of my house.
Technique tip: Start gluing from the bottom. If you mess up, unwrap and start over – the rope is forgiving.
4. Farmhouse Mason Jar Dispensers
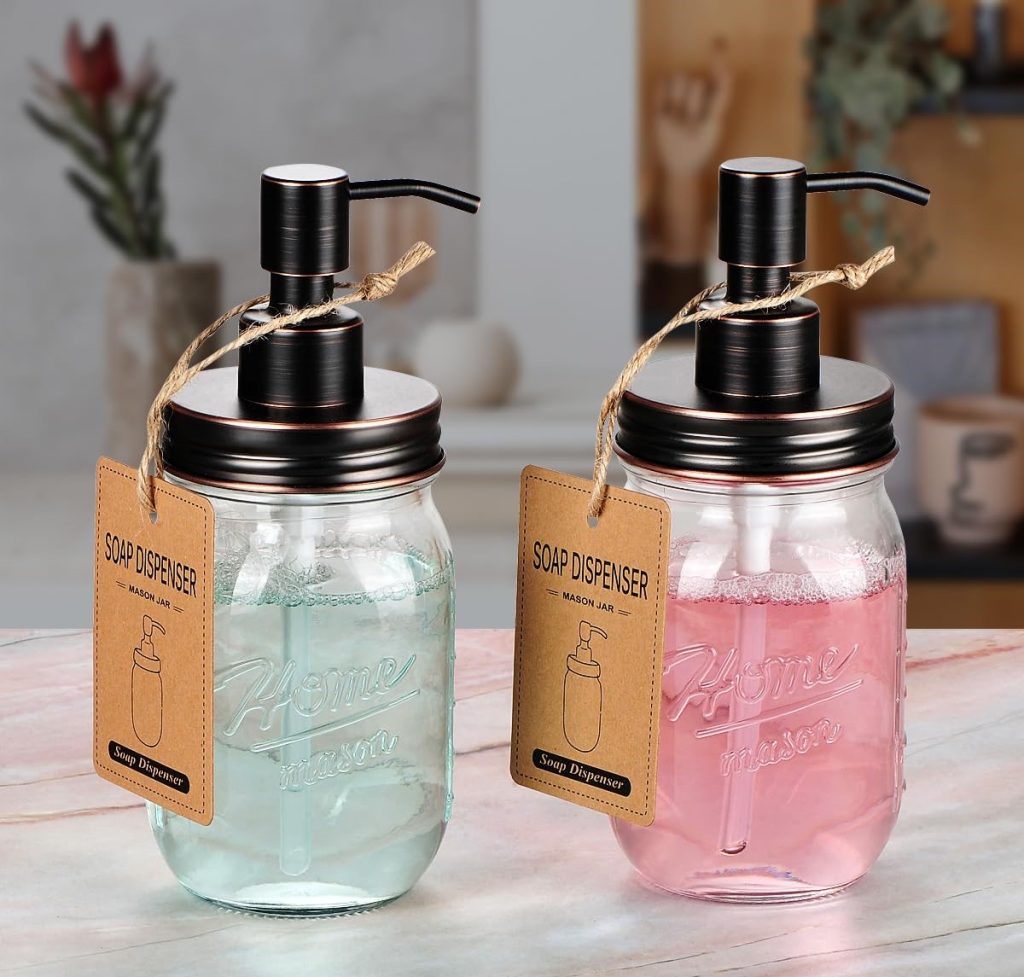
Materials:
- 2 large mason-style jars ($2)
- Pump dispensers ($3)
- Drill with metal bit
- Waterproof labels ($1)
Total: $6 for the pair (retail versions cost $25 each)
This project requires patience but delivers restaurant-quality results. Measure your pump’s threading, then drill slowly through the lid. Start with a small pilot hole to prevent cracking.
The magic is in the details. Clean, minimal labels reading “Hand Soap” and “Lotion” in modern fonts complete the farmhouse aesthetic.
I’ve gifted these to three friends who’ve all asked for the “source.” Sometimes the best compliment is someone wanting to copy your style.
Safety note: Wear safety glasses and work slowly. Metal lids can create sharp shavings.
5. Designer Throw Pillows from Placemats
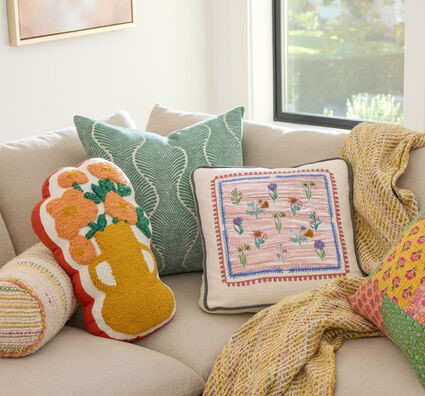
Materials:
- 4 textured placemats ($2)
- Fabric glue or iron-on hem tape ($1)
- Pillow inserts ($4 if needed)
Total: $3 per pillow (saves $20+ each)
This hack revolutionized how I think about seasonal decorating. Dollar store placemats often feature beautiful textures – woven patterns, embossed designs, interesting fabrics that cost $30+ per yard elsewhere.
Choose two matching placemats per pillow. Glue or hem three sides, leaving one open for the insert. The key is selecting placemats with substantial weight and interesting texture.
I change these seasonally. Fall brings warm oranges and deep reds. Spring gets soft blues and fresh greens. It’s like redecorating without the commitment.
Fabric tip: Avoid placemats that feel too thin or flimsy. You want substantial material that won’t tear easily.
6. Floating Wood Shelves
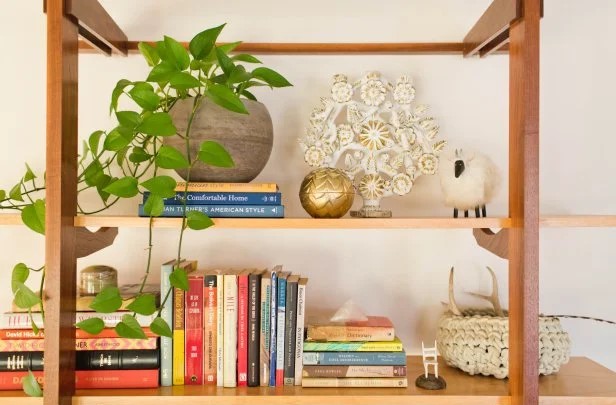
Materials:
- Wooden cutting boards ($2 each)
- Hidden L-brackets ($1 per shelf)
- Wood stain ($2)
- Heavy-duty wall anchors ($1)
Total: $6 per shelf (comparable to $30 versions)
Dollar store cutting boards are often solid wood – a fact that shocked me initially. Sand lightly and apply stain for instant upgrade. The pre-finished edges look professionally milled.
Mount with brackets hidden underneath for that “floating” effect. I use these in my kitchen for pretty dishes and small plants. They’ve held 15+ pounds without sagging.
Installation crucial: Use appropriate anchors for your wall type. Toggle bolts for drywall, masonry anchors for brick or concrete.
7. Abstract Art Collection
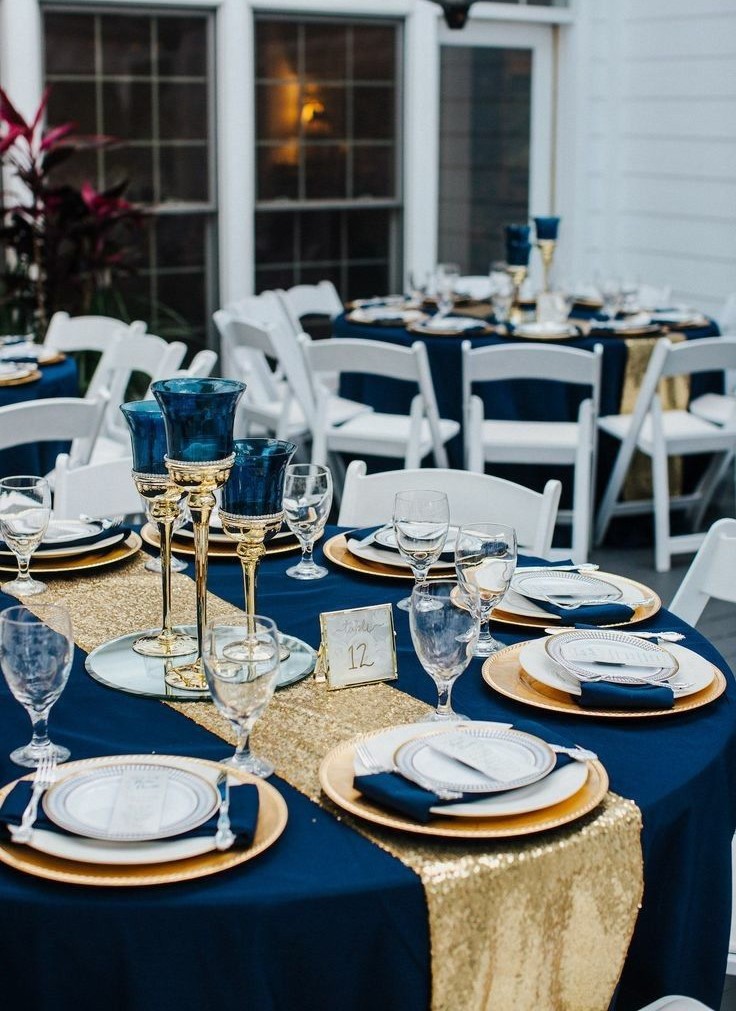
Materials:
- 3 canvas boards ($3)
- Acrylic paint in coordinating colors ($3)
- Painter’s tape ($1)
- Foam brushes ($1)
Total: $8 for three-piece set (gallery pieces cost $200+)
Abstract art intimidated me until I realized the secret: confidence over perfection. Choose colors that complement your existing palette. Use painter’s tape for clean geometric lines.
Paint with bold, deliberate strokes. Overthinking creates stiff, unnatural results. Some of my best pieces happened when I stopped trying so hard.
My dining room features a three-piece set in navy, gold, and cream. Guests consistently ask about the “artist.” The answer always surprises them.
Color strategy: Pull colors directly from existing décor. This ensures your art feels intentional rather than random.
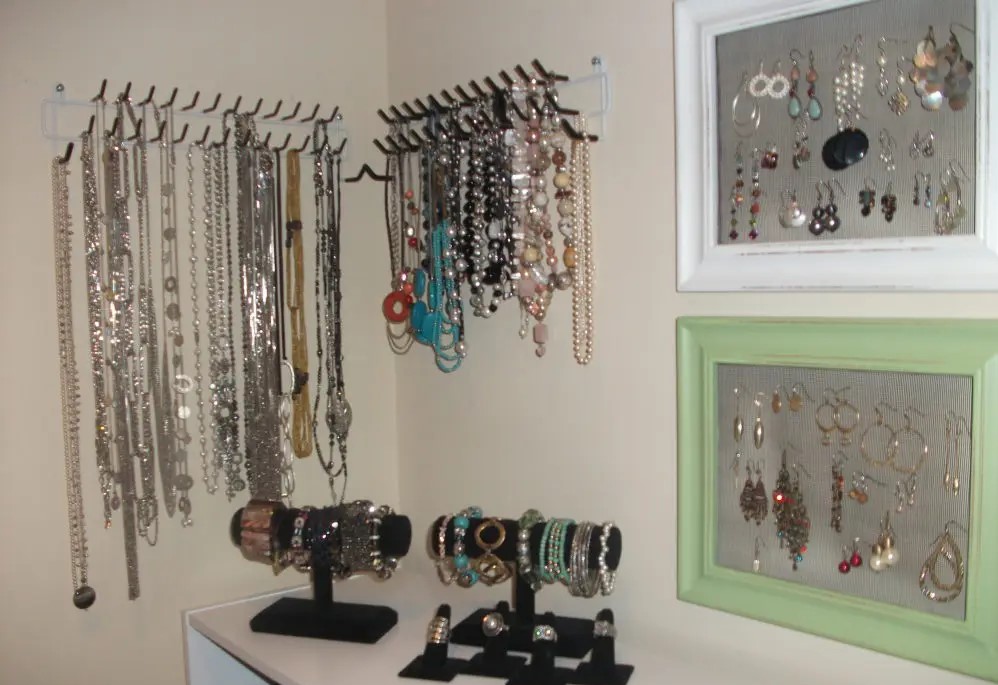
8. Jewelry Organization System
Materials:
- Small glass bowls and dishes ($4 for set)
- Decorative contact paper ($1)
- Small labels ($1)
Total: $6 (beats $40 jewelry organizers)
This system ended my morning jewelry hunt forever. Line bowl bottoms with pretty contact paper – it prevents scratching and adds custom color. Group similar items: rings together, earrings together, bracelets together.
The glass keeps everything visible while decorative lining adds intentional style. It looks curated rather than utilitarian.
Organization tip: Use different sized bowls for different jewelry types. Small bowls for rings, medium for earrings, larger for bracelets.
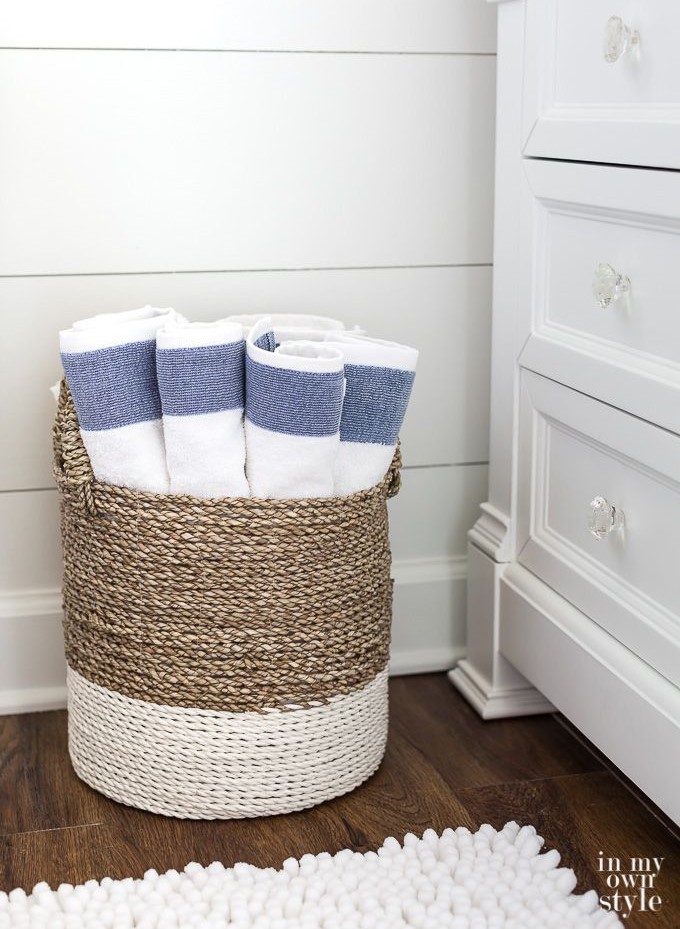
9. Boutique Wire Basket Storage
Materials:
- Wire baskets ($2 each)
- Chunky rope or fabric strips ($1)
- Optional labels ($1)
Total: $4 per basket (similar baskets retail for $25+)
Raw wire baskets look industrial and cold. Transform them by weaving rope through the wire in a basket-weave pattern. This softens the appearance and adds premium texture.
I use these throughout my home: bathroom for towels, bedroom for scarves, kitchen for produce. The uniform rope treatment creates cohesion while different sizes serve various functions.
Weaving technique: Start from the bottom and work up. Keep consistent tension for professional results.
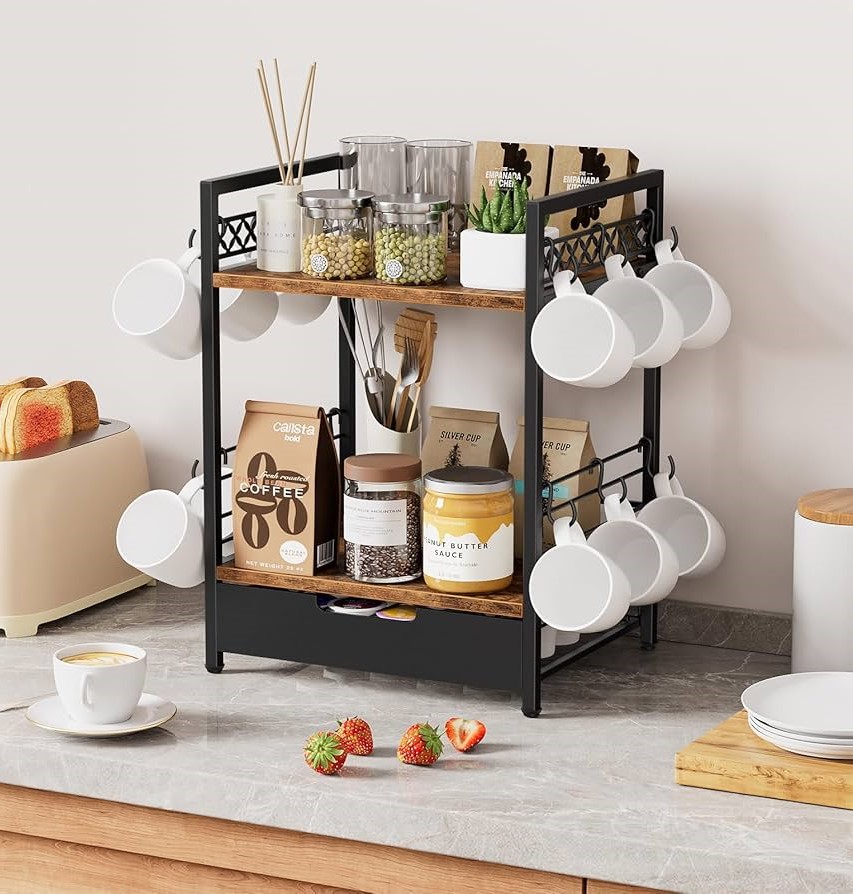
10. Coffee Bar Mug Display
Materials:
- Small wooden spice rack ($2)
- Wood stain or chalk paint ($1)
- Cup hooks ($1)
Total: $4 (coffee shop style for less)
This project turned my kitchen corner into an Instagram-worthy coffee station. Sand the spice rack lightly, then stain or paint to match your kitchen. Add cup hooks to the bottom rail for hanging mugs.
Mount near your coffee maker for functionality and style. It frees cabinet space while creating visual interest on blank walls.
Styling note: Limit yourself to your prettiest mugs. This is display storage, not everyday storage.
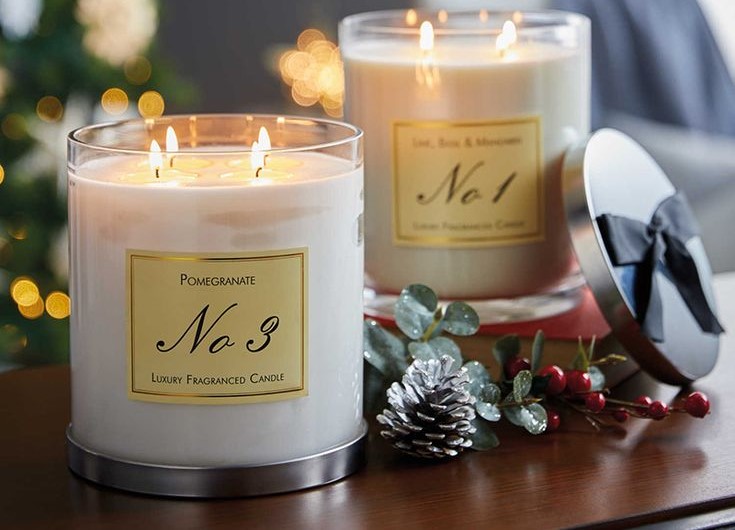
11. Luxury Candle Makeover
Materials:
- Plain pillar candles ($3 for pack)
- Colored wax melts ($1)
- Double boiler setup
Total: $4 for custom candles (boutique candles cost $25+ each)
This technique transforms boring white candles into designer pieces. Melt colored wax melts in a double boiler, then dip or drizzle over plain candles for custom patterns.
Work quickly but deliberately. I create ombre effects by dipping candles partially, then redipping at different levels. The color variation looks intentionally artistic.
Safety first: Never leave melting wax unattended. Always use indirect heat via double boiler method.
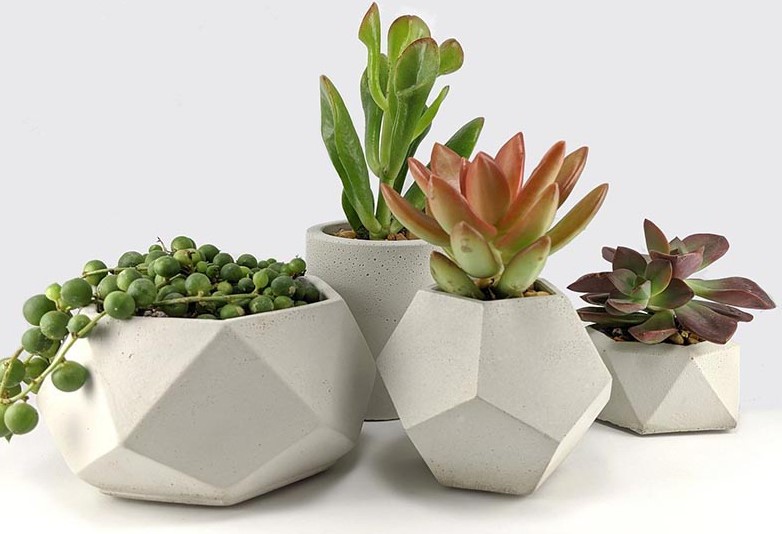
12. Modern Geometric Planters
Materials:
- Geometric containers ($2 each)
- Metallic spray paint ($2)
- Small succulents ($3 each)
- Cactus potting mix ($2)
Total: $7-9 per planter (designer versions cost $35+)
Look for interesting shaped food containers – geometric ones work perfectly for modern planters. Metallic spray paint instantly elevates plastic to premium status.
Succulents thrive in these containers and require minimal care. Group several together, varying heights and shapes for dynamic displays.
Plant tip: Ensure containers have drainage holes. If not, drill small holes in the bottom to prevent root rot.
13. Statement Mirror Upgrade
Materials:
- Basic round mirror ($3)
- Decorative wood molding ($2)
- Wood glue ($1)
- Stain or paint ($1)
Total: $7 (designer mirrors start at $75)
Plain mirrors get major impact with decorative molding frames. Cut molding to fit around mirror perimeter, creating mitered corners for professional appearance.
This project requires patience and precision, but the results are stunning. My entryway mirror gets compliments from every visitor.
Measuring tip: Measure twice, cut once. Accurate cuts are crucial for professional-looking corners.
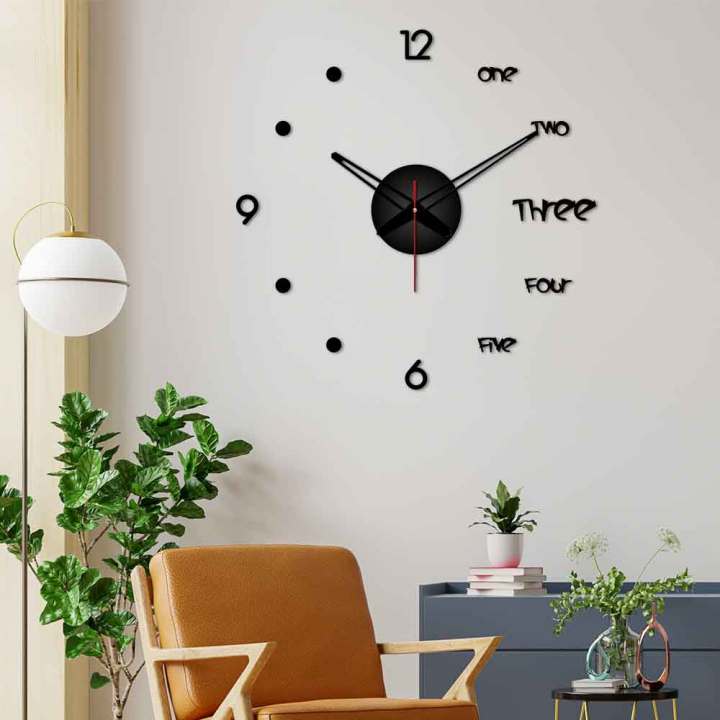
14. Custom Wall Clock
Materials:
- Large decorative plate ($2)
- Clock mechanism kit ($3)
- Drill with appropriate bit
- Number stickers or stencils ($1)
Total: $6 (custom clocks retail for $50+)
Any large, round item can become a custom clock. I’ve used decorative plates, chargers, even large coasters. Drill center hole for clock mechanism, add numbers if desired.
Choose bases that complement existing décor for truly personalized timepieces. My kitchen features a clock made from a vintage-style plate that perfectly matches my farmhouse theme.
Drilling tip: Start with small pilot hole, then enlarge gradually. This prevents cracking or chipping.
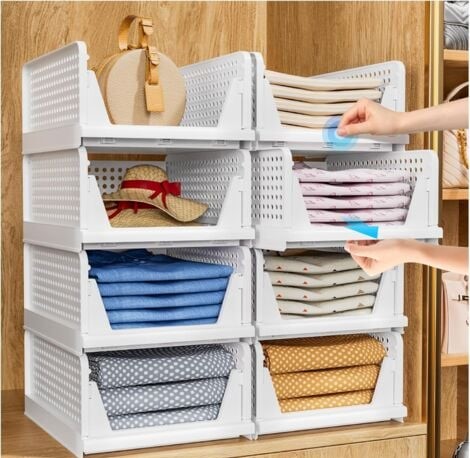
15. Sophisticated Storage Boxes
Materials:
- Plain storage boxes ($2 each)
- Decorative contact paper ($2)
- Ribbon trim ($1)
- Labels ($1)
Total: $6 per box (boutique storage costs $30+ each)
Transform cardboard storage into sophisticated organization tools. Cover with decorative contact paper, then add ribbon trim for finished edges. Label clearly for functionality.
I use these throughout my home office for stylish storage that doesn’t detract from décor. The uniform treatment creates intentional, curated appearance.
Application secret: Work slowly with contact paper, smoothing air bubbles as you go. Rushing creates wrinkles that ruin the professional finish.
Bringing It All Together
The secret to successful dollar store DIY isn’t individual projects – it’s creating cohesion. Choose a consistent color palette that threads through multiple pieces. My home features whites, grays, and natural wood tones across most DIY projects.
Quality matters more than quantity. Better to complete three projects beautifully than rush through ten with sloppy results. Take time with finishing touches – they make all the difference.
Don’t copy exactly. Use these as inspiration, then adapt for your space and style. Your home should reflect your personality, not look like a magazine page.
Shopping Smart: Dollar Store Strategy
After years of dollar store hunting, I’ve learned timing matters. New inventory arrives mid-week – Wednesday and Thursday shopping yields best selection. Seasonal items appear earlier than expected: fall décor in late July, Christmas items in September.
Quality varies between stores and shipments. Examine items carefully before purchasing. Look for sturdy construction, good weight (heavier usually means better), and smooth finishes.
Some items are worth upgrading. Paint, for instance, performs much better when you invest in quality. Use dollar stores for tools and basic materials, but upgrade key components when projects warrant it.
The Real Value of DIY
These projects represent more than savings – they’re about creating homes that reflect personality and creativity. When friends compliment your décor, there’s special satisfaction knowing you created it yourself.
Start with one or two projects that excite you most. Master those techniques, then gradually expand skills. Soon you’ll see potential in every dollar store item.
The goal isn’t furnishing your entire home from dollar stores. It’s strategically choosing high-impact projects that deliver maximum style for minimal investment. Used thoughtfully, these techniques help achieve the designer look you want without the premium price.
Your home should reflect your style and creativity, not your budget. These 15 projects prove that with imagination and effort, anyone can create beautiful, personalized spaces that look far more expensive than they actually cost.
Ready to transform your space on a budget? Pick one project for this weekend and see where creativity takes you. Tag us in your before-and-after photos – we love seeing these ideas come to life!
Once you have your dollar store projects complete, the next challenge is keeping everything organized. Check out these dollar store kitchen organization ideas for more budget-friendly solutions throughout your home.
Frequently Asked Questions
What dollar store items are best for DIY home projects?
The best dollar store finds for DIY projects are plain frames, glass vases, wooden items, candles, and plain fabric. These neutral bases take paint, stain, and embellishments easily. Avoid anything with complex molded plastic detailing — it looks cheap even after painting. Dollar Tree, Family Dollar, and Five Below each carry different strengths: Dollar Tree excels at frames and glass; Five Below has better craft supplies.
How do I make dollar store crafts look high-end?
The secret is in the finishing. Spray paint (especially in matte black, gold, or white) instantly elevates cheap items. Sand wooden pieces before painting and seal with a clear coat. Use real brushes and quality craft glue rather than cheap alternatives — these small upgrades make a visible difference in the final result. Cohesion matters too: stick to a two or three-color palette across all your projects so the room feels intentional rather than randomly assembled.
How much can I realistically save doing dollar store DIY projects?
The savings are significant. A designer-style gallery wall using dollar store frames and free printables costs around 5-5 versus 50-00 for a comparable retail version. Faux concrete planters run about – each to DIY versus 5-0 at home stores. Across the 15 projects in this article, you can save 00-00 compared to buying equivalent items retail — with results that are often more personalized and unique.
Related Articles You’ll Love:
- Small Apartment Organization: 20 Budget Storage Solutions Under $30
- Gallery Wall on a Budget: 12 Creative Ideas Using Free Printables
- 10 Genius IKEA Hacks for Small Spaces Under $30
Leave a Reply